Crafts
Looking for some craft inspiration, or ideas for activities, scroll below…
Elephant:
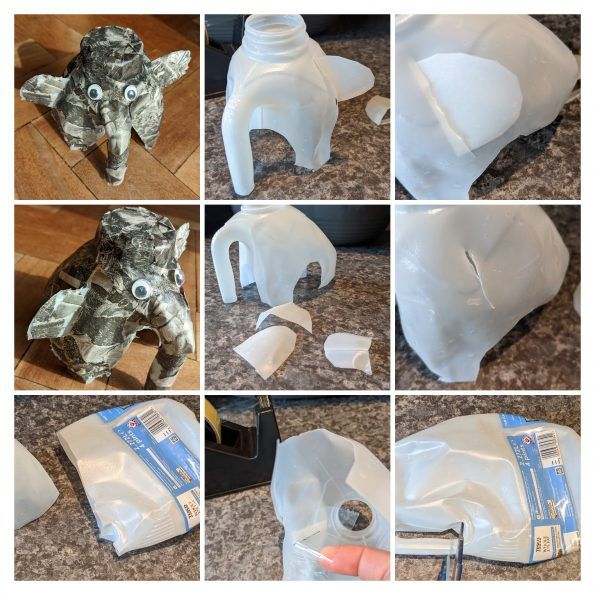
- Trim a plastic milk bottle around the end of the handle. Cut out 4 semi circles, one out the front and back and one on each side, to shape legs.
- Use the off cuts to make ears. Carefully fold a tab on the flat end of the semi-circle.
- Cut a slit in each side of the bottle. Slide the ears into the slits and tape them in place.
- Using PVA glue and newspaper, cover the elephant.
- Add googly eyes.
- (Optional) Make a family of elephants using different bottle sizes.
Fish:
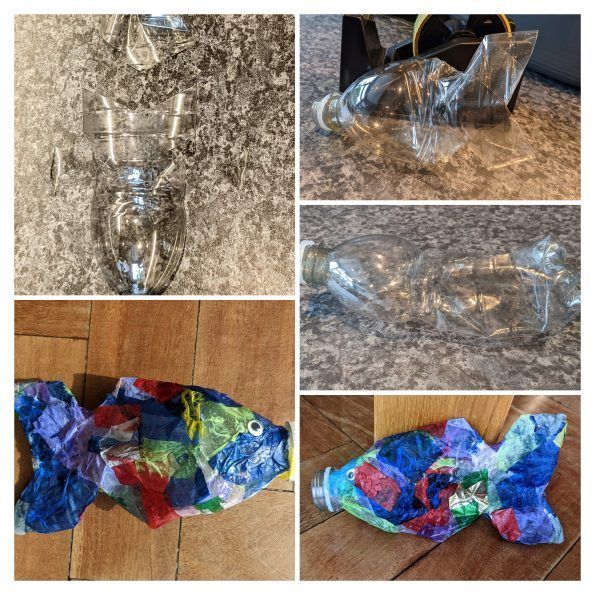
- Using a water bottle remove the lid and flatten the lower half of the bottle.
- Cut a triangle shape out of the bottom of the bottle to make it look like a fish tail.
- Cut out a triangle from the top and bottom of the fish to shape the body and tail.
- Tape together the end of the tail to hold it together and cover any sharp edges
- Using PVA glue, decorate with squares of tissue paper and googly eyes.
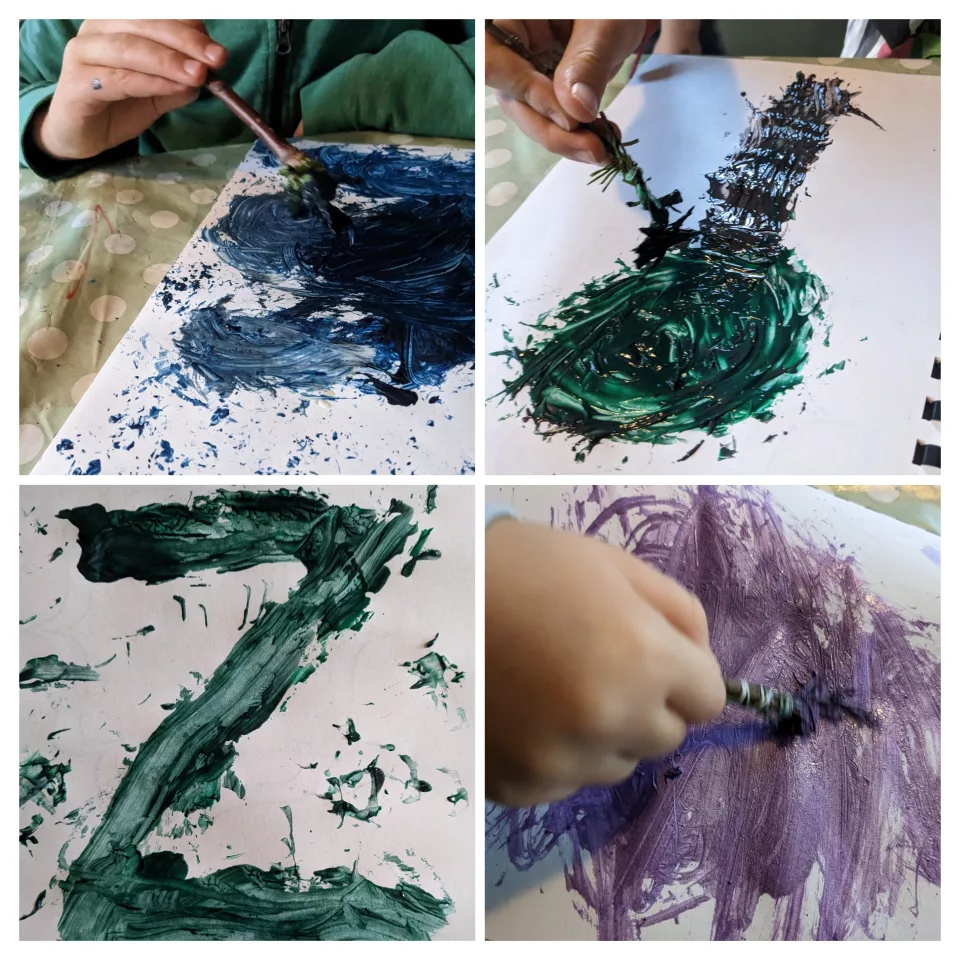
Home-made Paint Brushes
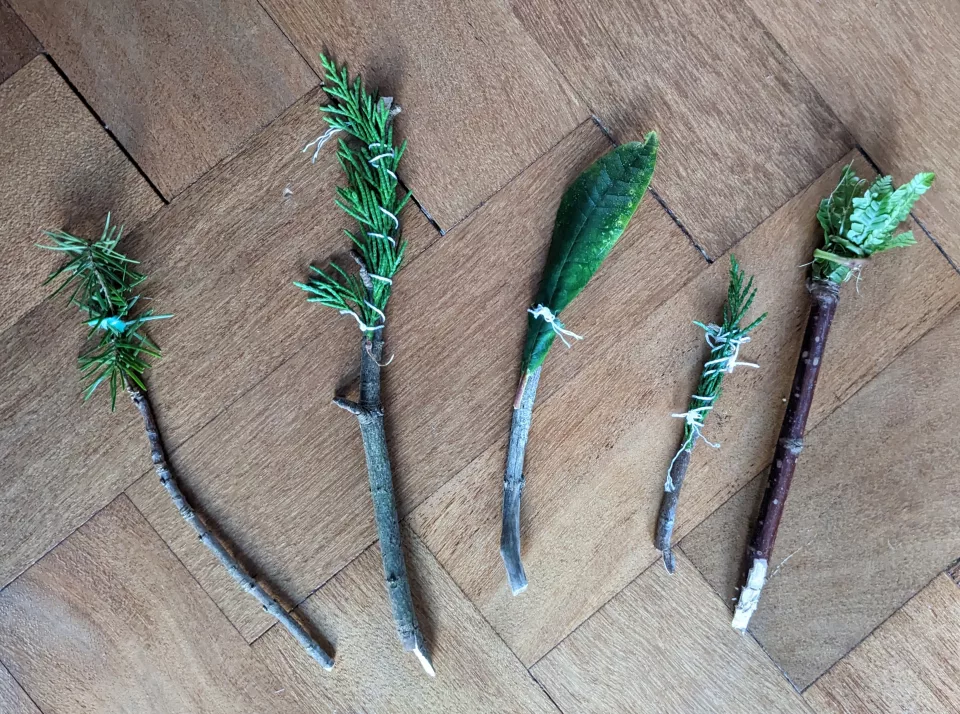
It seemed impossible that the children would be able to paint anything with these brushes, put together from bits they found in the garden and some string.
However, as it turned out, they created some very interesting textures, which all the children enjoyed experimenting with.
One of the children particularly liked painting a stormy sea with his little mound of fern leaves!
This project was an idea in our ‘Layers of Learning’ curriculum, inspired by a medieval artist who made his own paint brushes – Giotto di Bondone.
It would also be a fun activity to add to a nature study. Maybe during the evergreen week, coming up in the third week of February, in the ‘Exploring Nature with Children’ curriculum.
Printing with pine cones could make some interesting textures too!
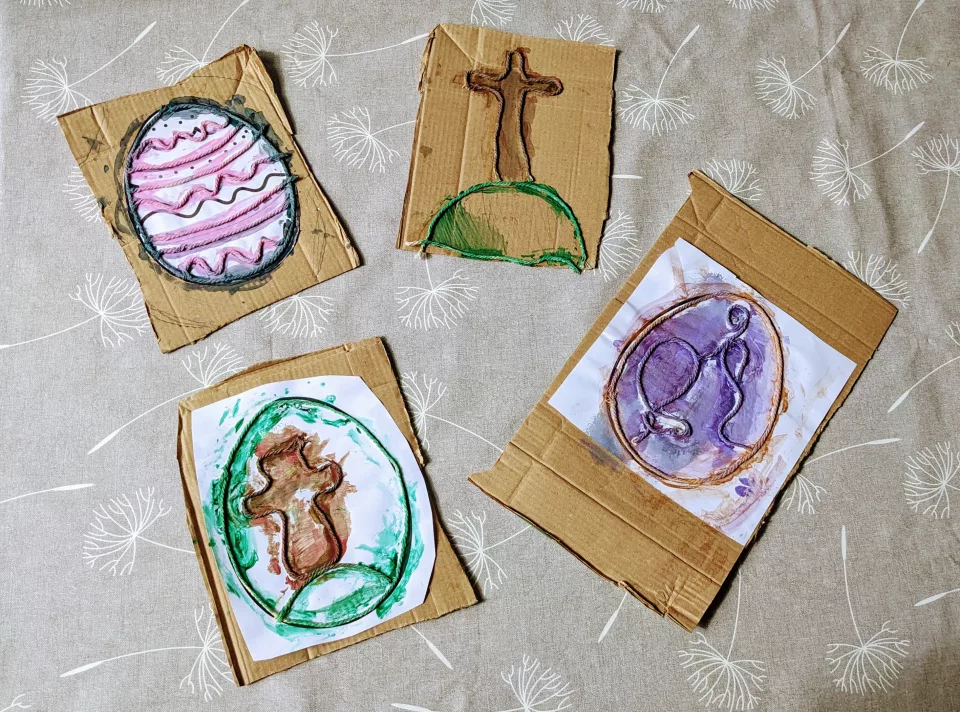
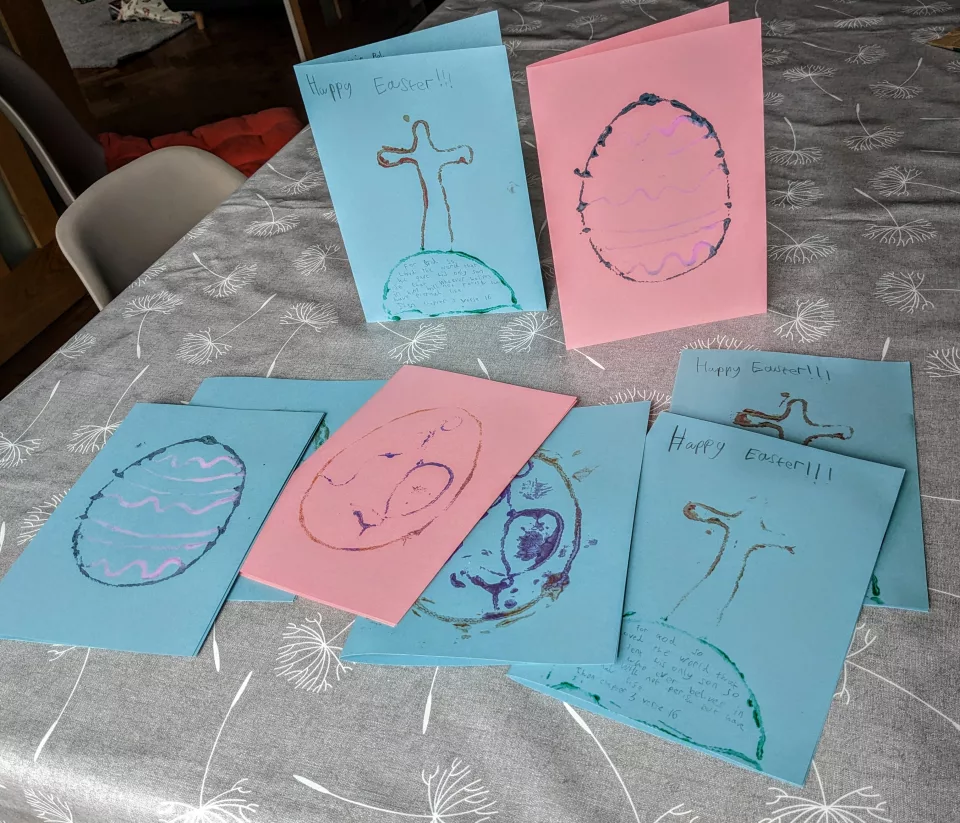
Egg Stamp Cards:
This is a fun craft to do in the build up to Easter. Using twine to design your own stamps is a cheap and easy way to experiment with printmaking in art too.
You will need:
- Cardboard
- PVA glue
- Twine (or wool)
- Paint
- Cardstock
- Patterned egg template for younger children (We used the template in this lovely ‘Extraordinary Eggs Nature Unit Study’, currently free from Wildflowers by Sarah.
Instructions:
- Glue your template onto cardboard or draw a simple image onto the cardboard.
- Apply PVA glue to the lines drawn.
- Glue the twine over the lines and wait for the glue to dry.
- Once dry, paint the twine and print your pattern onto your cardstock. You may wish to test it on scrap paper first.
- Allow to dry and add text to the front of the card if desired.
Christmas Table Decorations
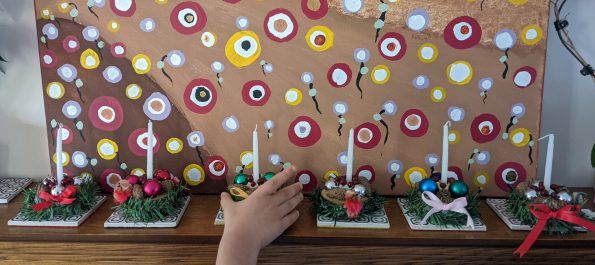
You will need:
Wood slice
Small candle
Play dough
Small pine cones
Mini baubles
Glue gun
Spray glue or spray varnish
Glitter
Ribbon
(Optional) Additional decorations eg holy or evergreen
Instructions:
Place a piece of play dough in the centre of the wood slice
Push in the candle
Place decorations around the candle, gluing in place with a glue gun.
Finish with a piece of ribbon tied into a bow.
Spray a little glue or varnish and quickly sprinkle with glitter.
Allow to dry.
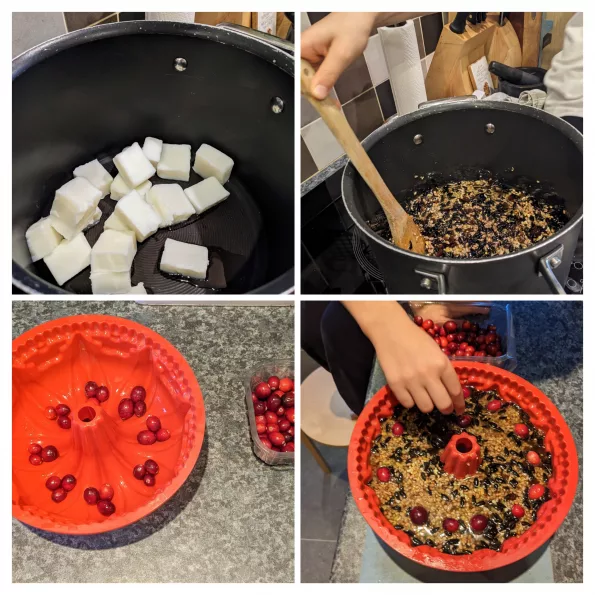
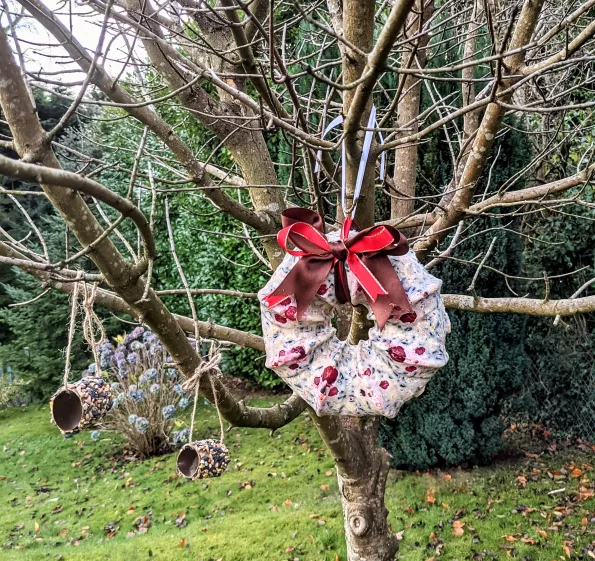
Seed Decorations
Jesus’ birth sowed the seeds of peace. From sowing seeds to seed baubles. One of our favourite Christmas decorations to make are these festive bird feeders.
You will need:
- 500g Lard
- 575g Wild bird seed
- 150g Dried fruit
- 150g fresh cranberries
- Bundt tin
- Large ribbon
Instructions:
- Melt lard
- Add seeds and fresh cranberries
- Stir and pour into a bundt tin
- Allow it set hard in the fridge
- Remove and tie with a thick ribbon.
- Hang from a tree in the garden.
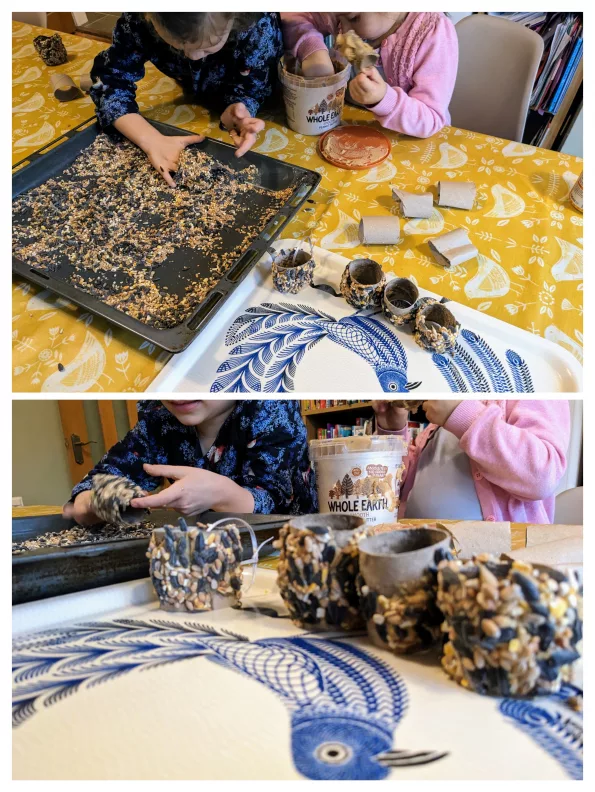
Peanut Butter Baubles
You will need:
- Empty toilet rolls
- Peanut butter
- Wild bird seed
- Jute string
Instructions:
- Cut toilet rolls in half
- Smear with peanut butter
- Roll in seeds
- Attach string and hang from trees and bushes in your garden.
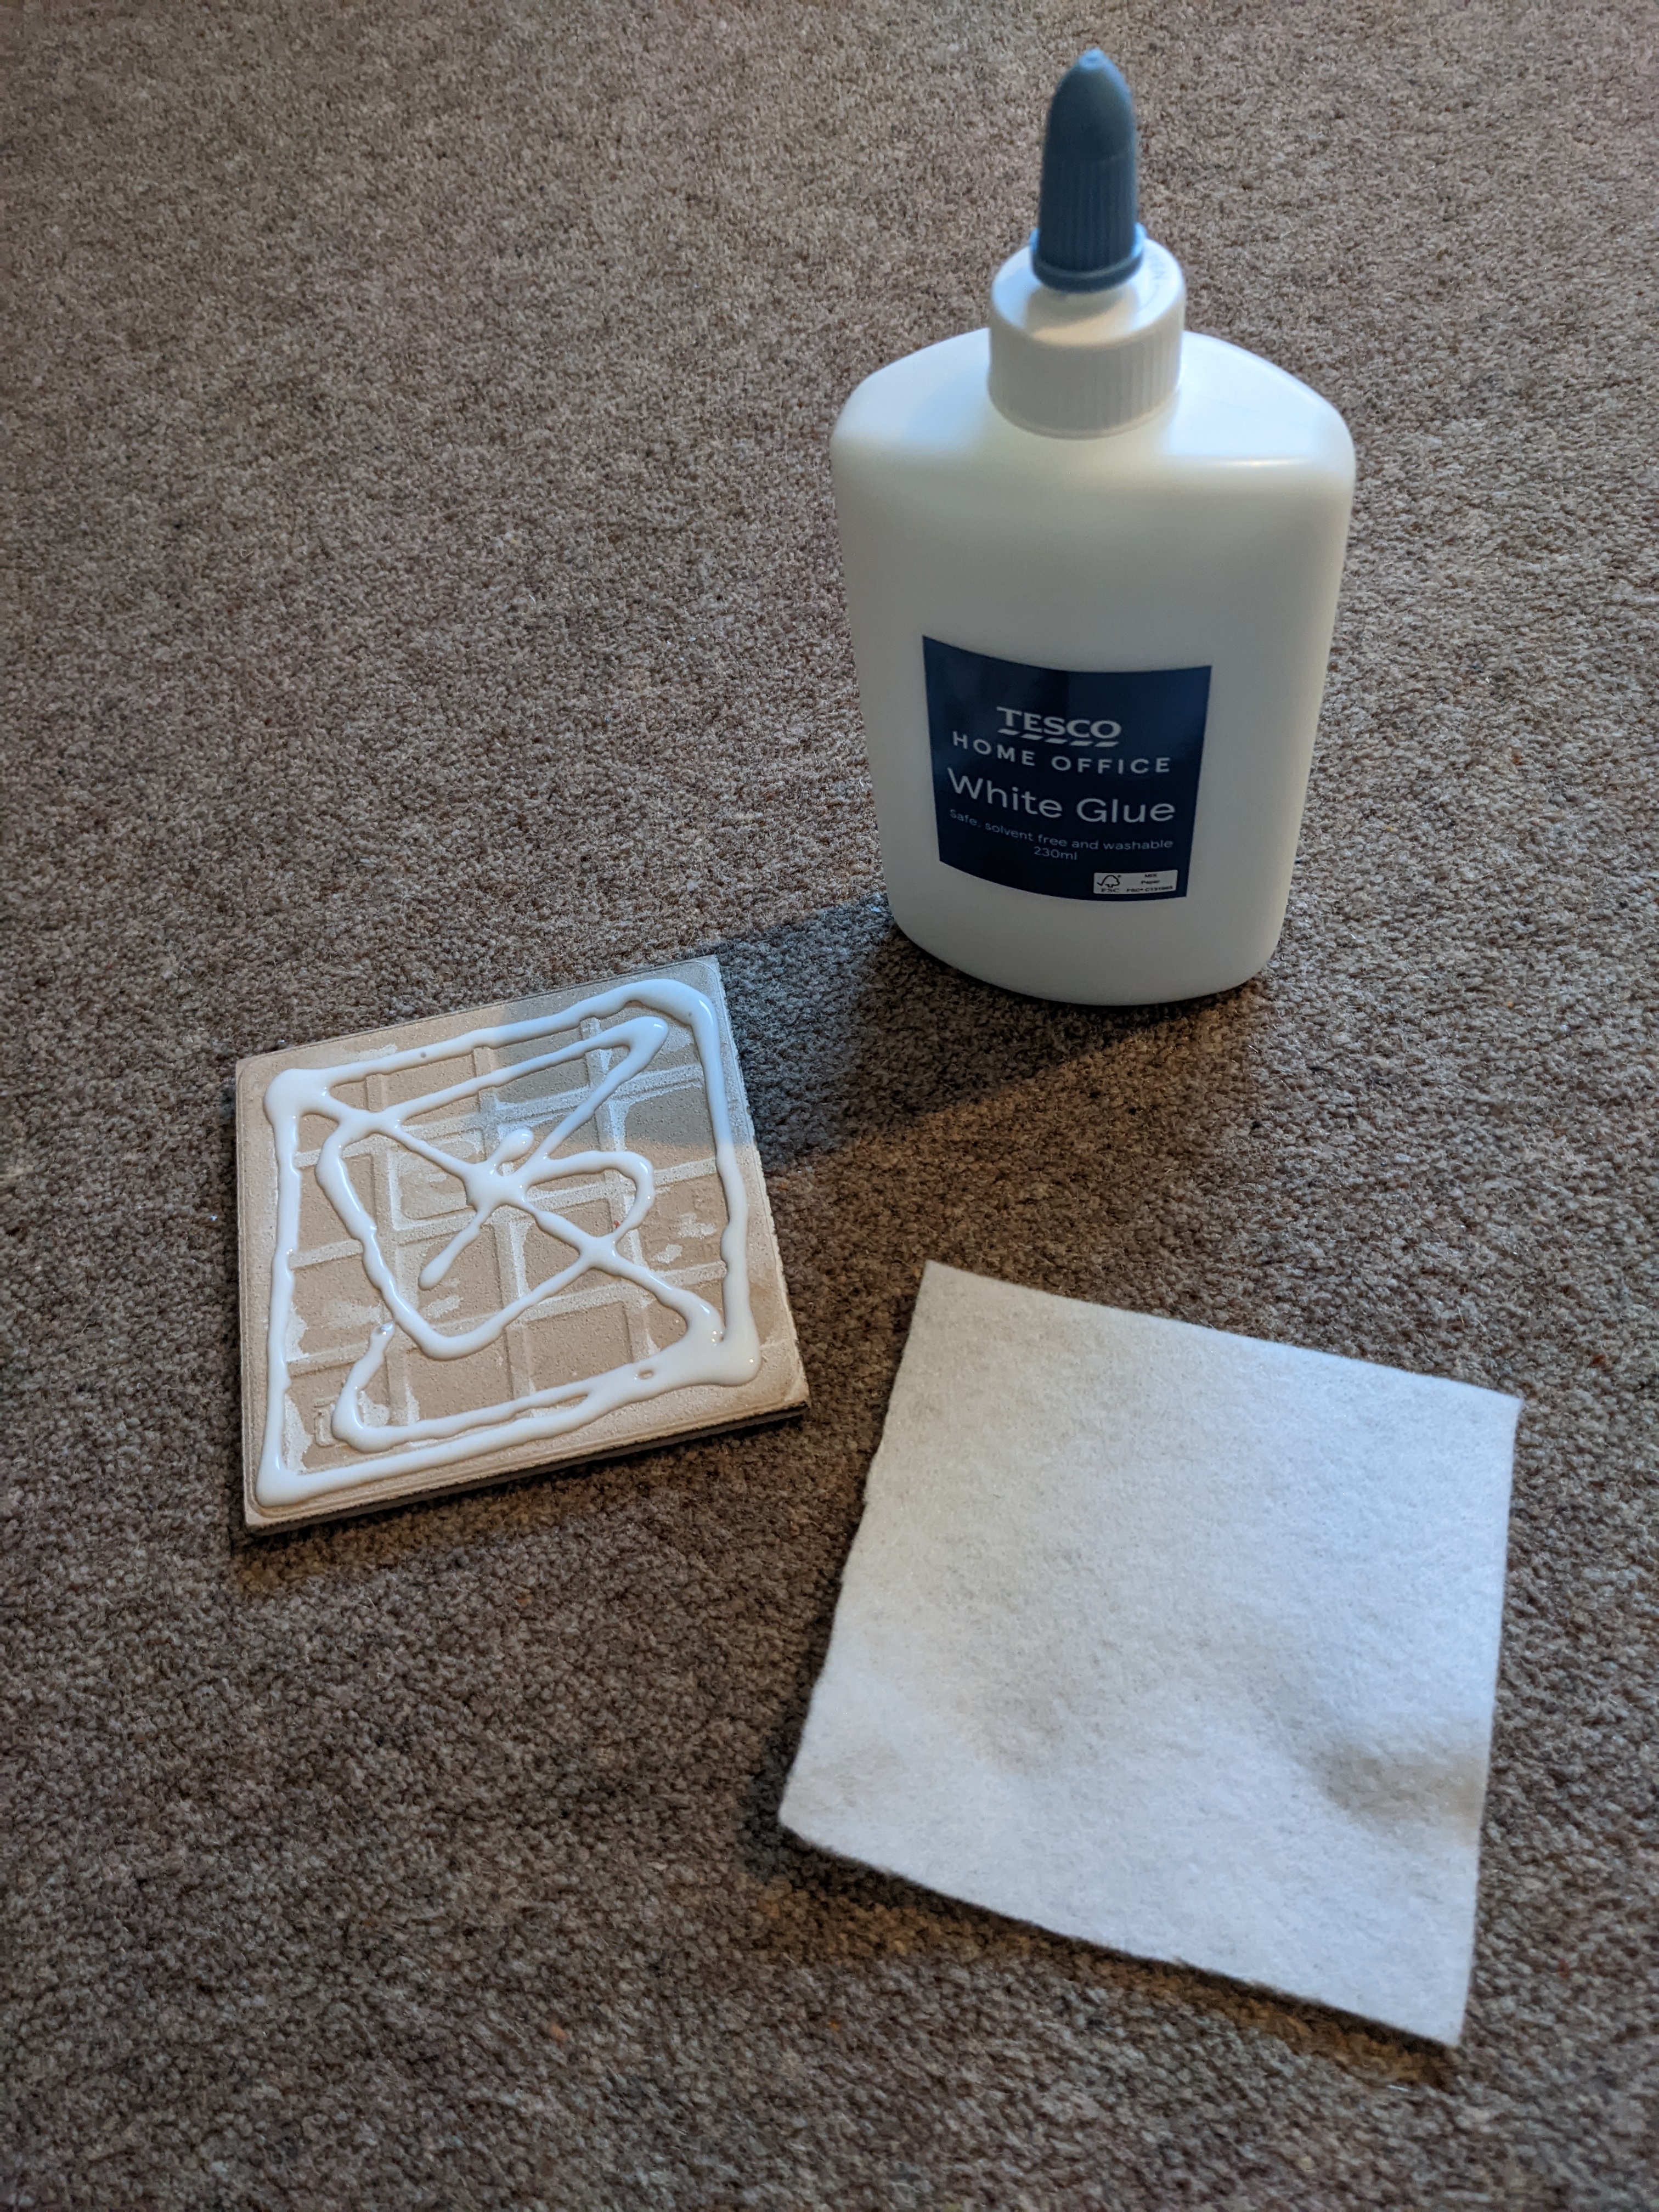
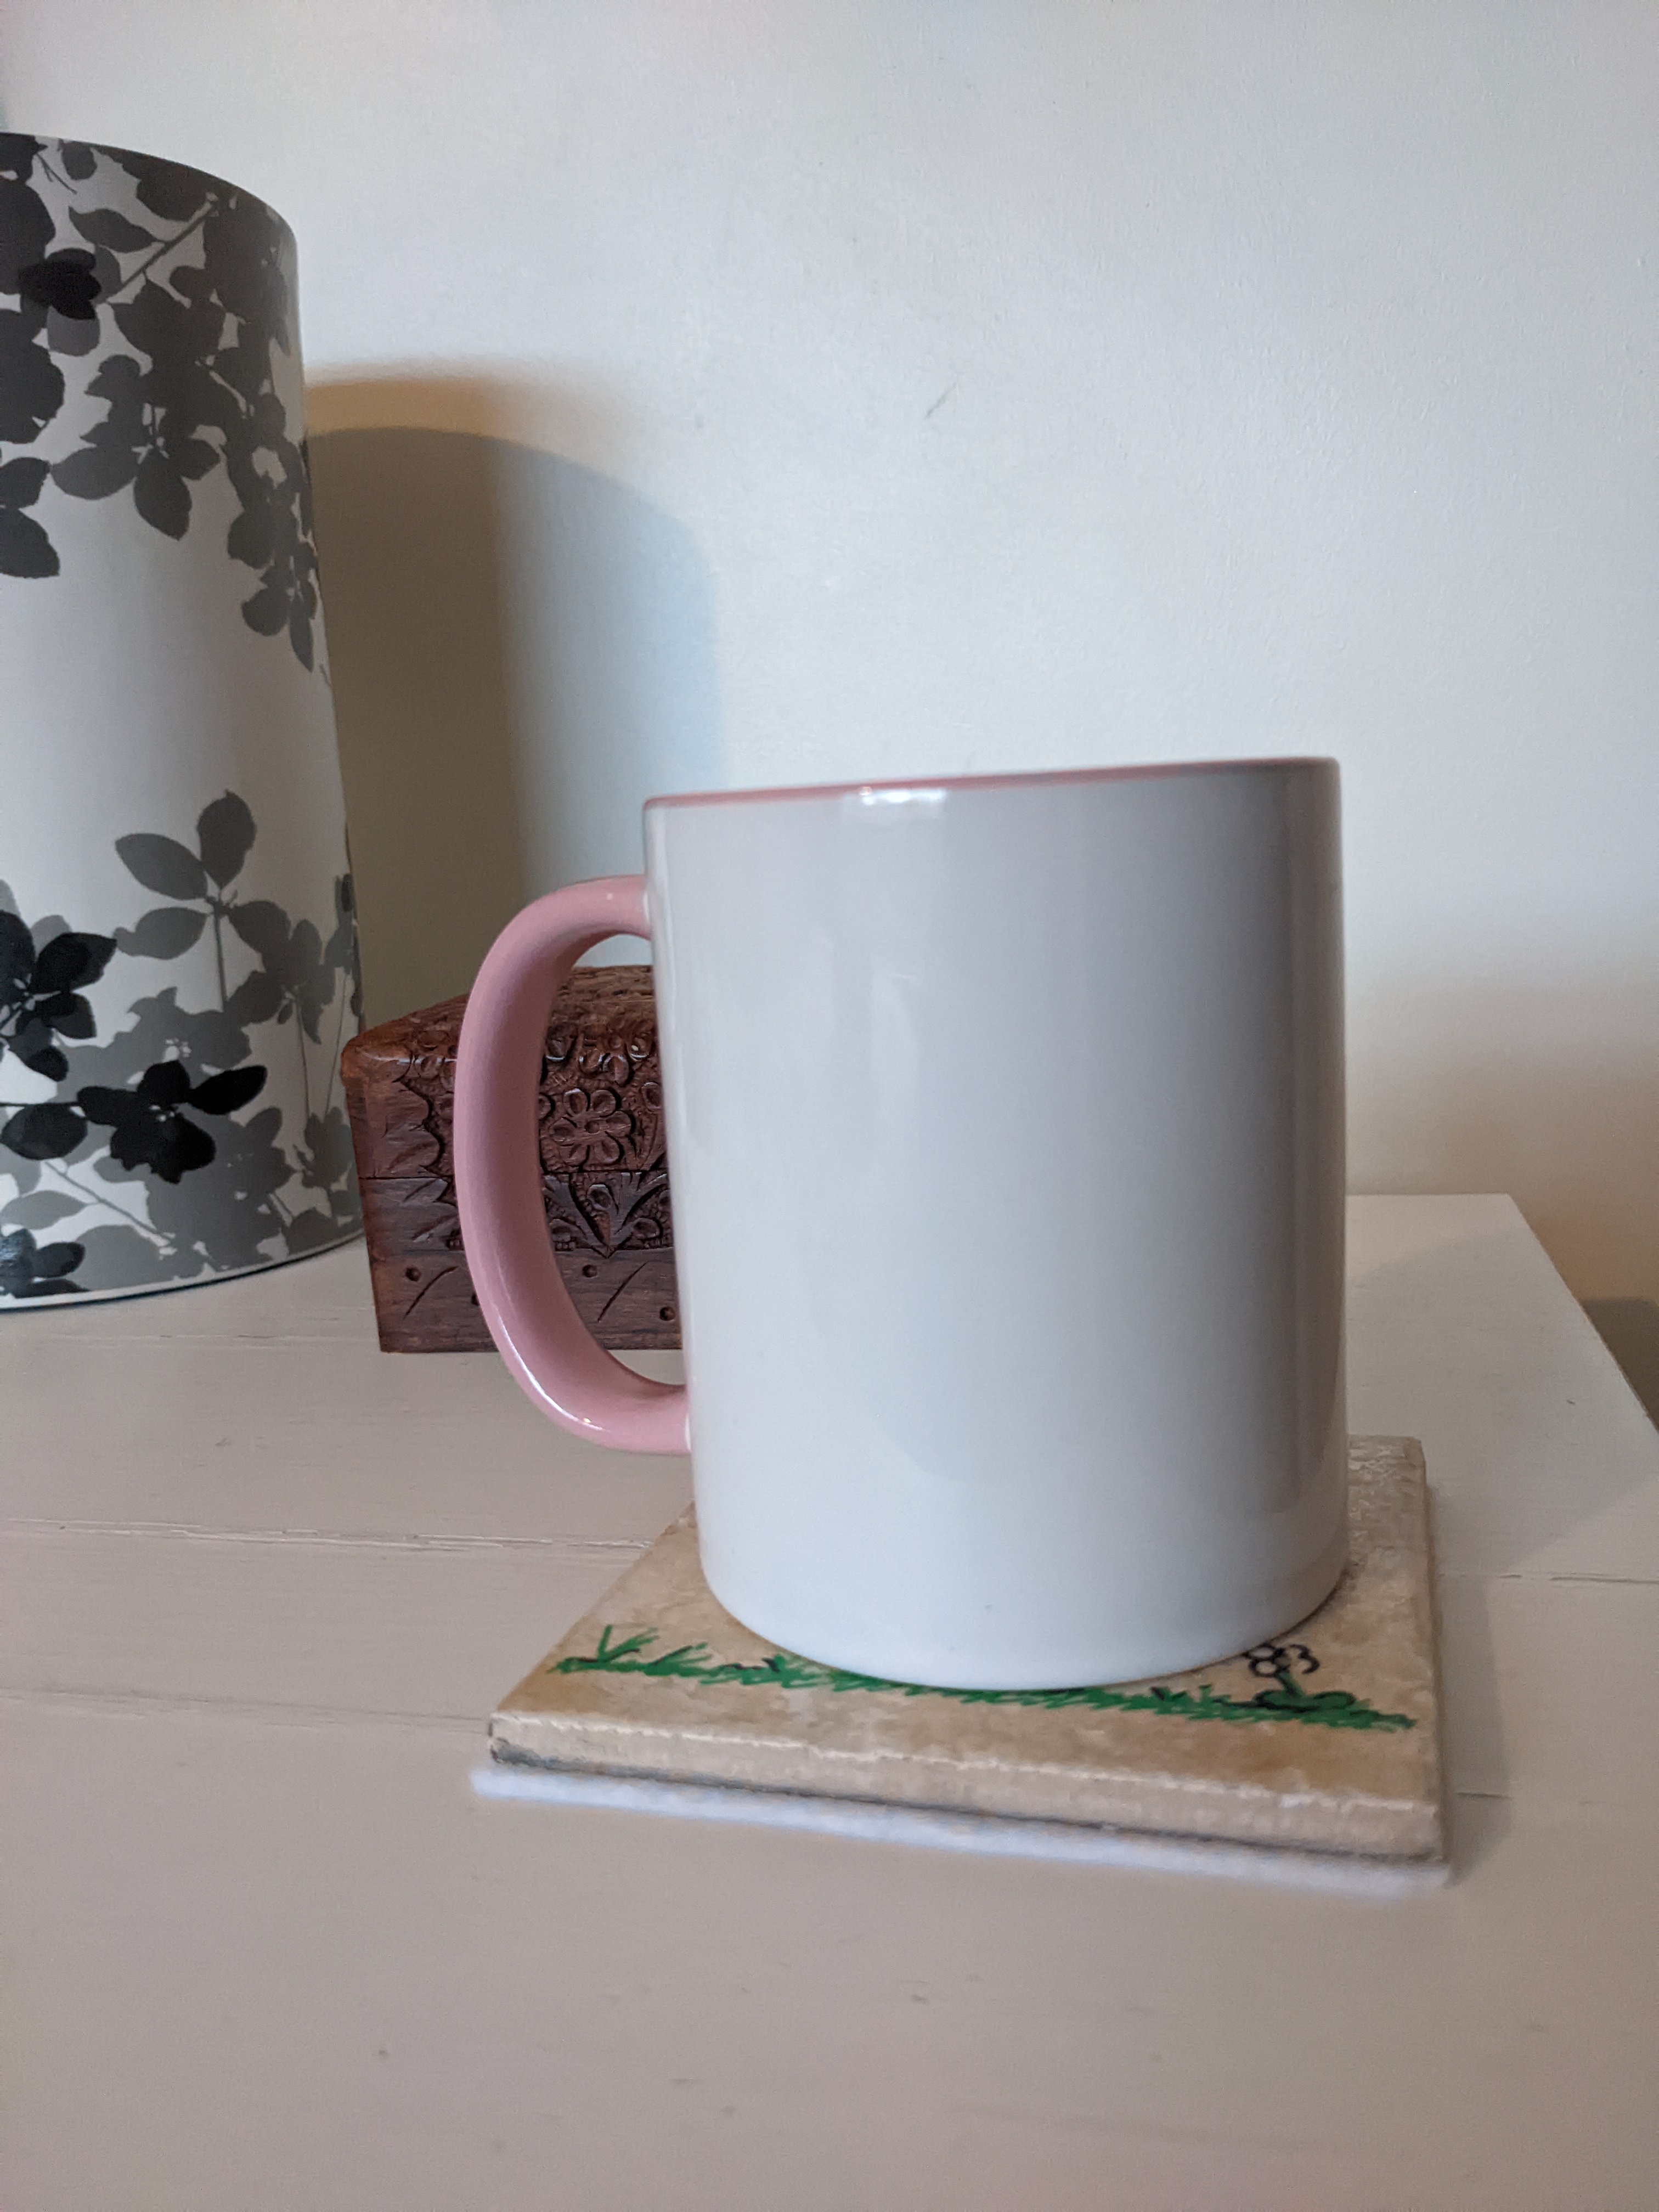
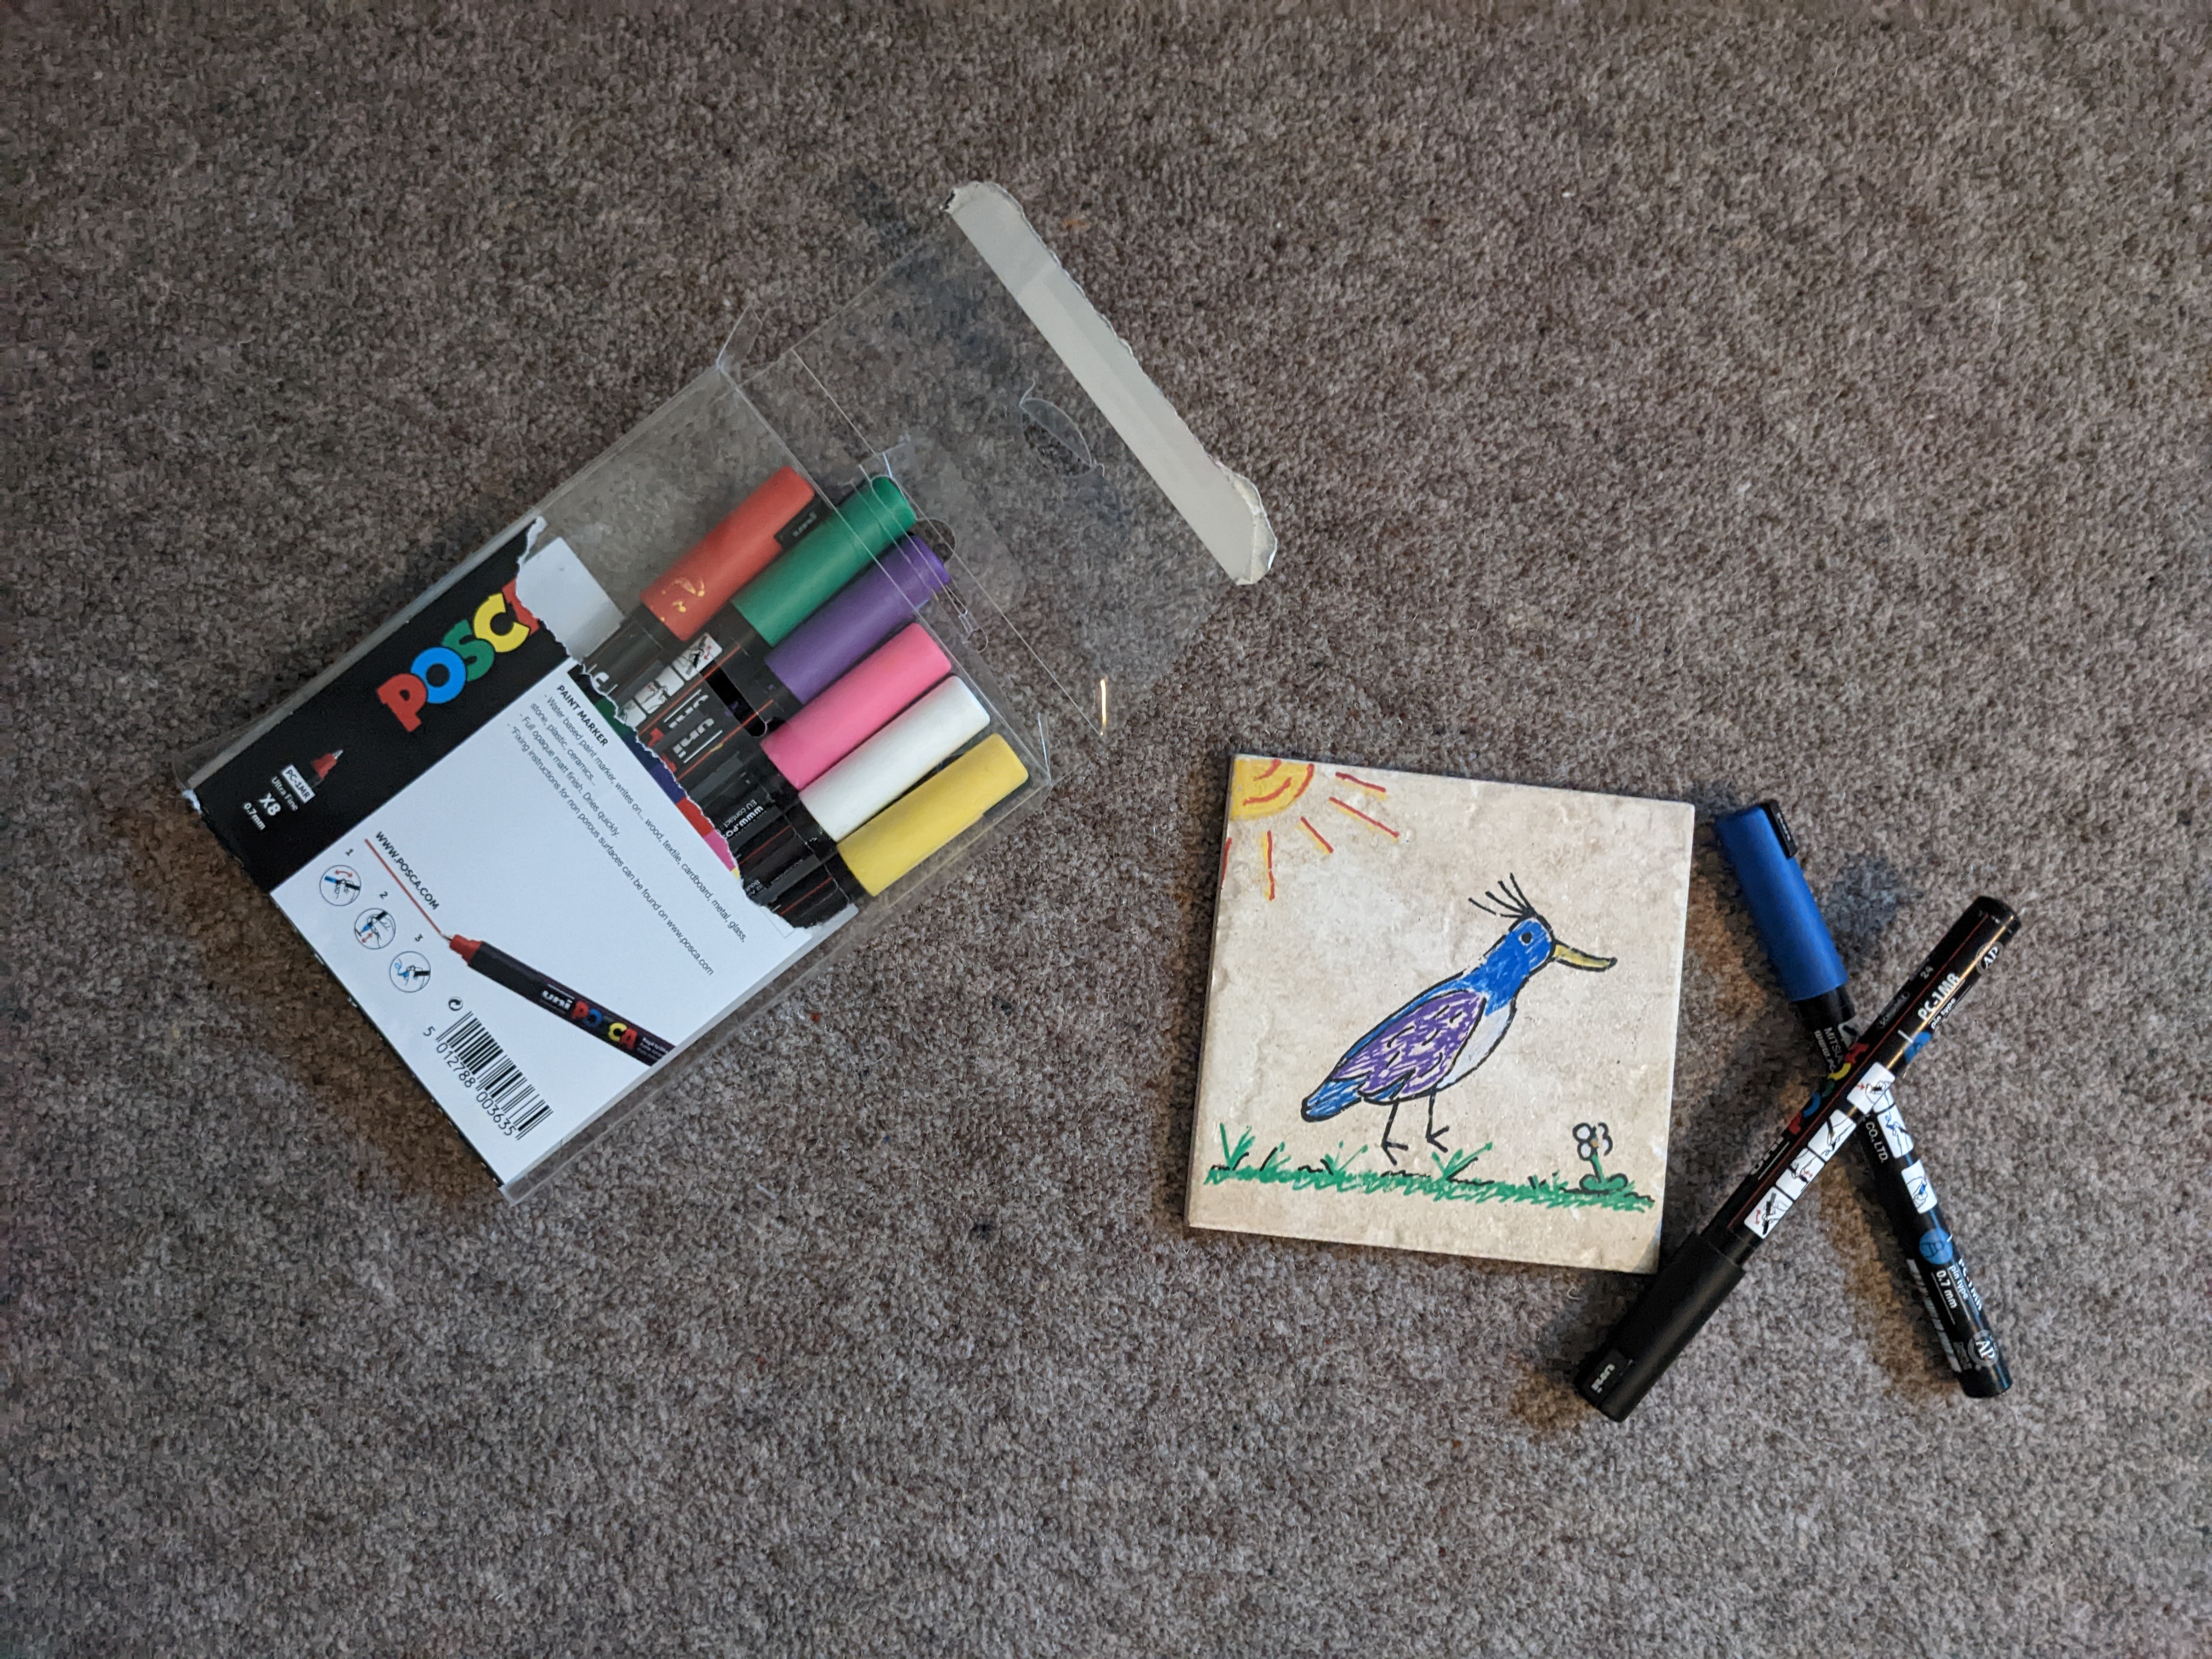
Homemade Coasters
You will need:
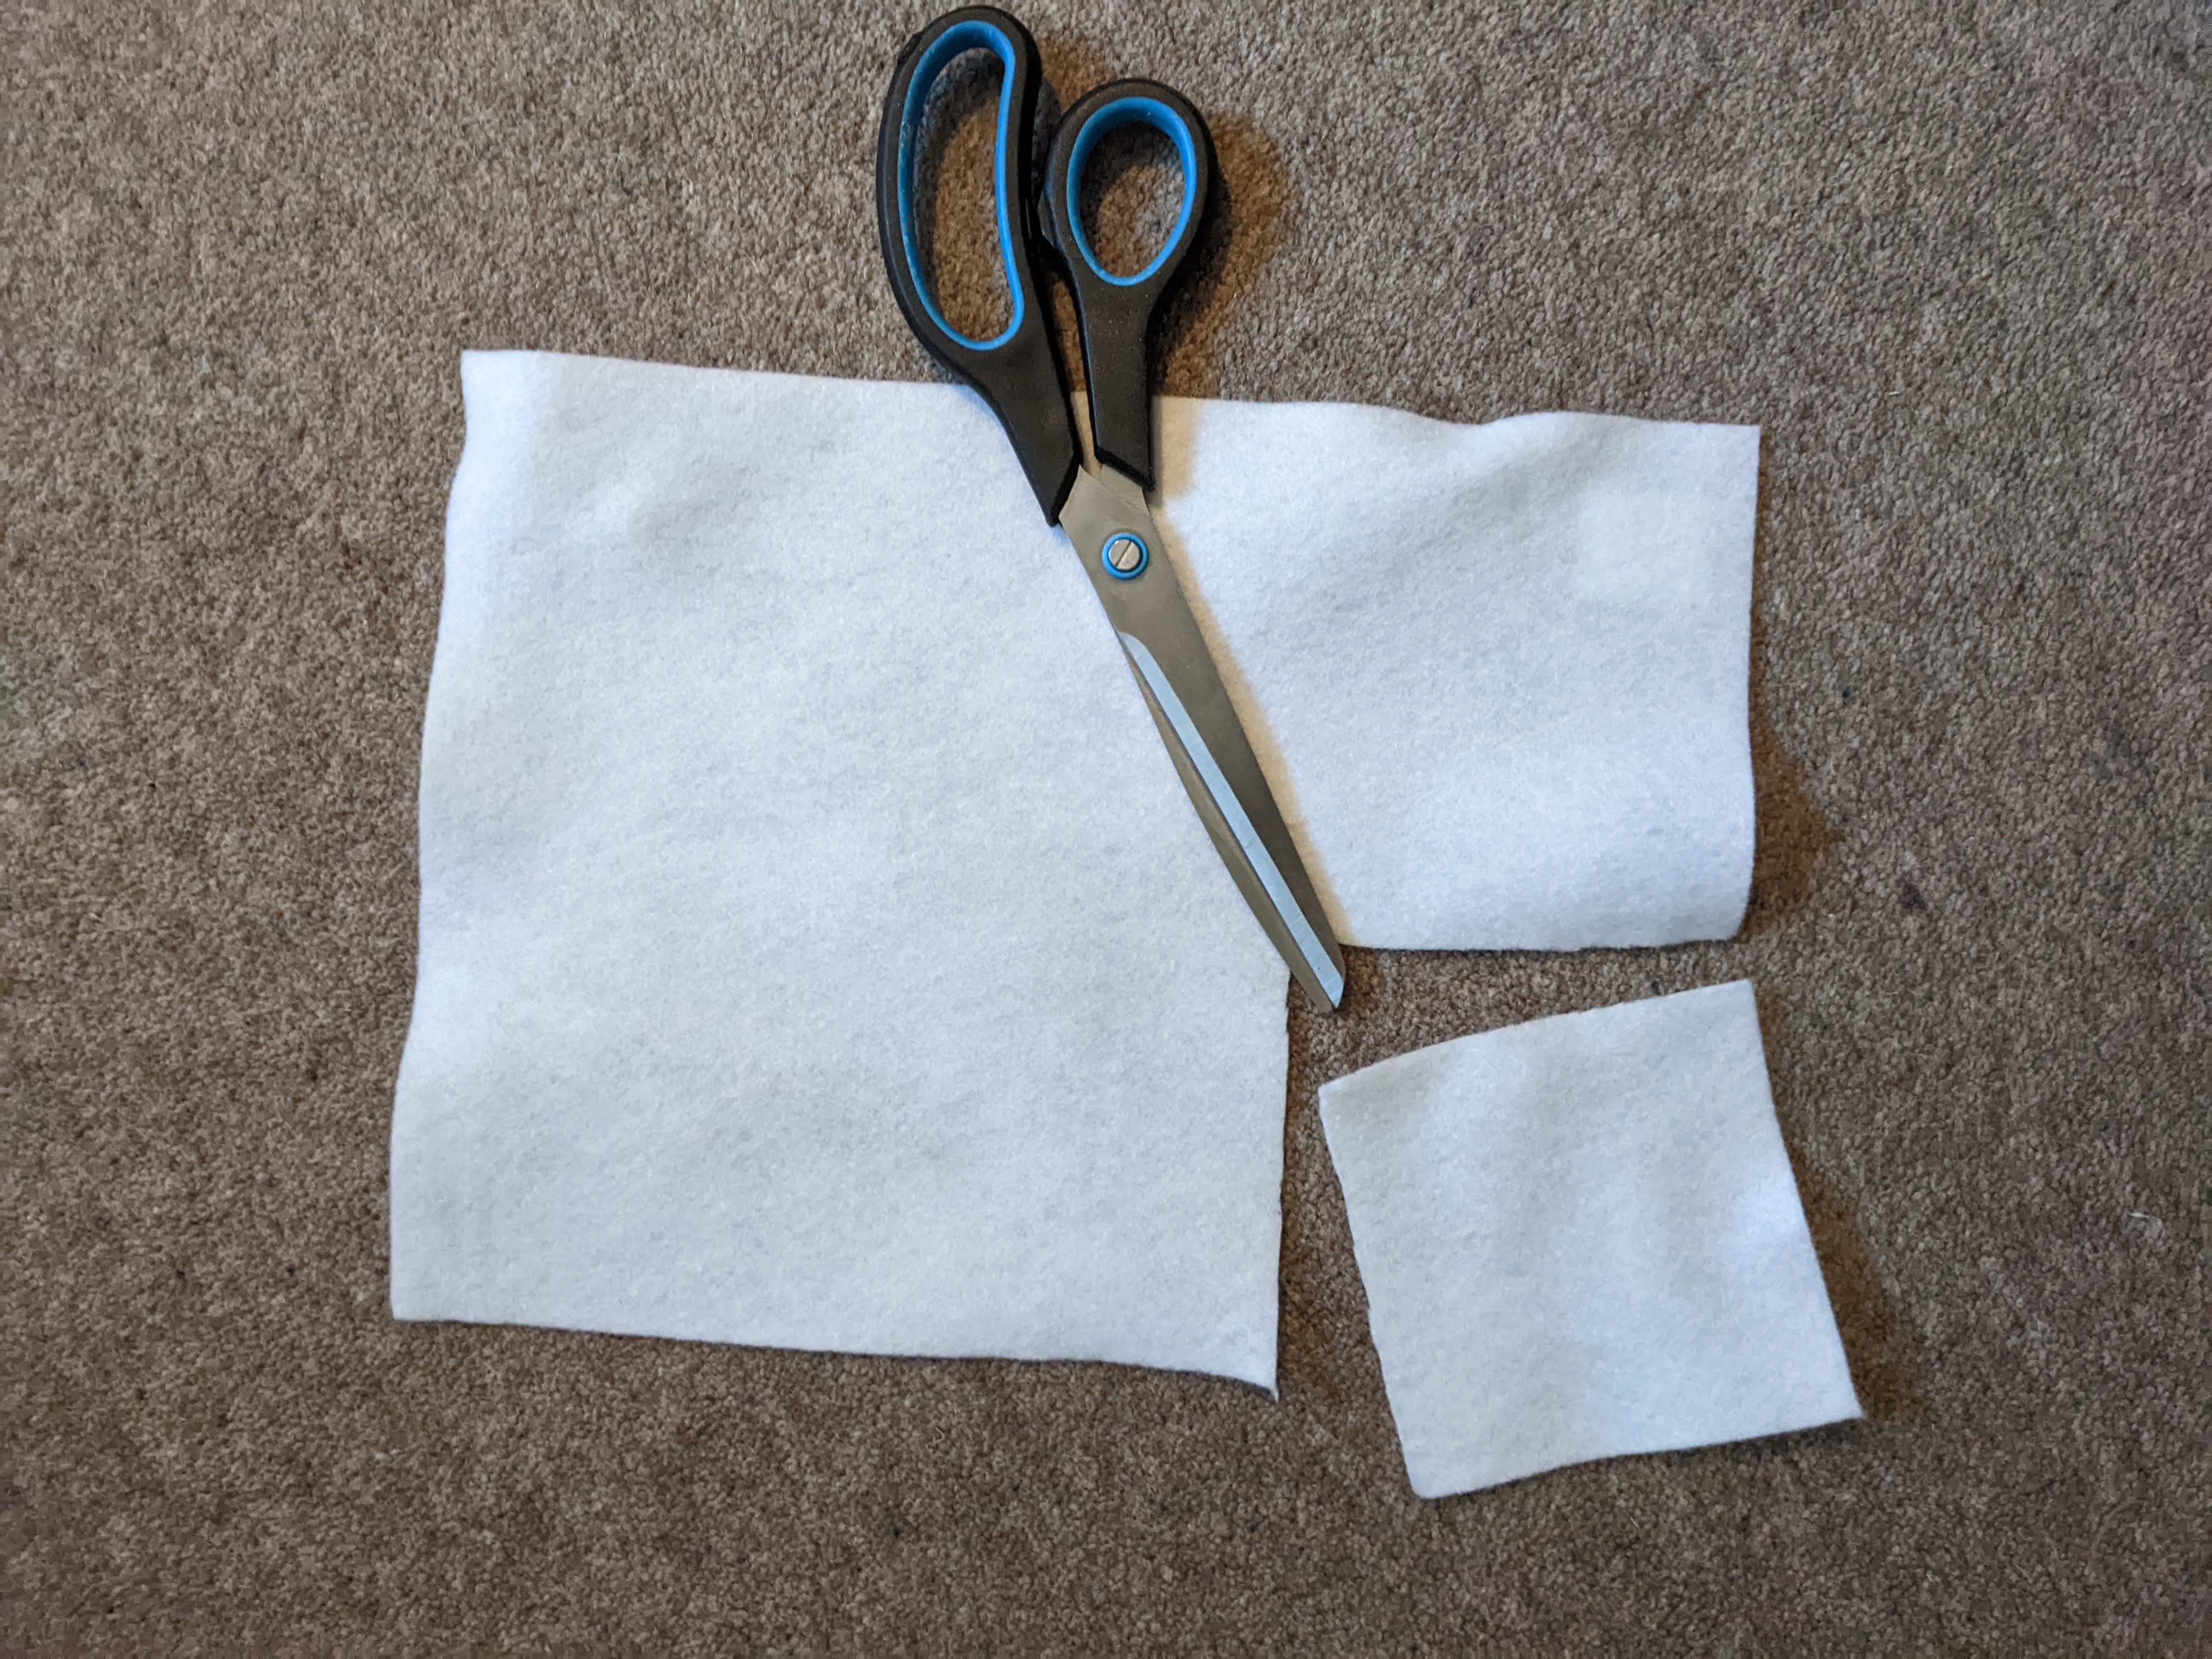
- Felt
- Tiles around 10cm in diameter
- PVA glue
- Scissors
- Posca Permanent Paint Pens
Instructions:
- Draw your design on the tile and wait for it to dry
- Trace around your tile onto felt using a pencil
- Cut out the felt along the lines drawn using sharp scissors
- Glue the felt to the underside of the tile and wait for it to dry
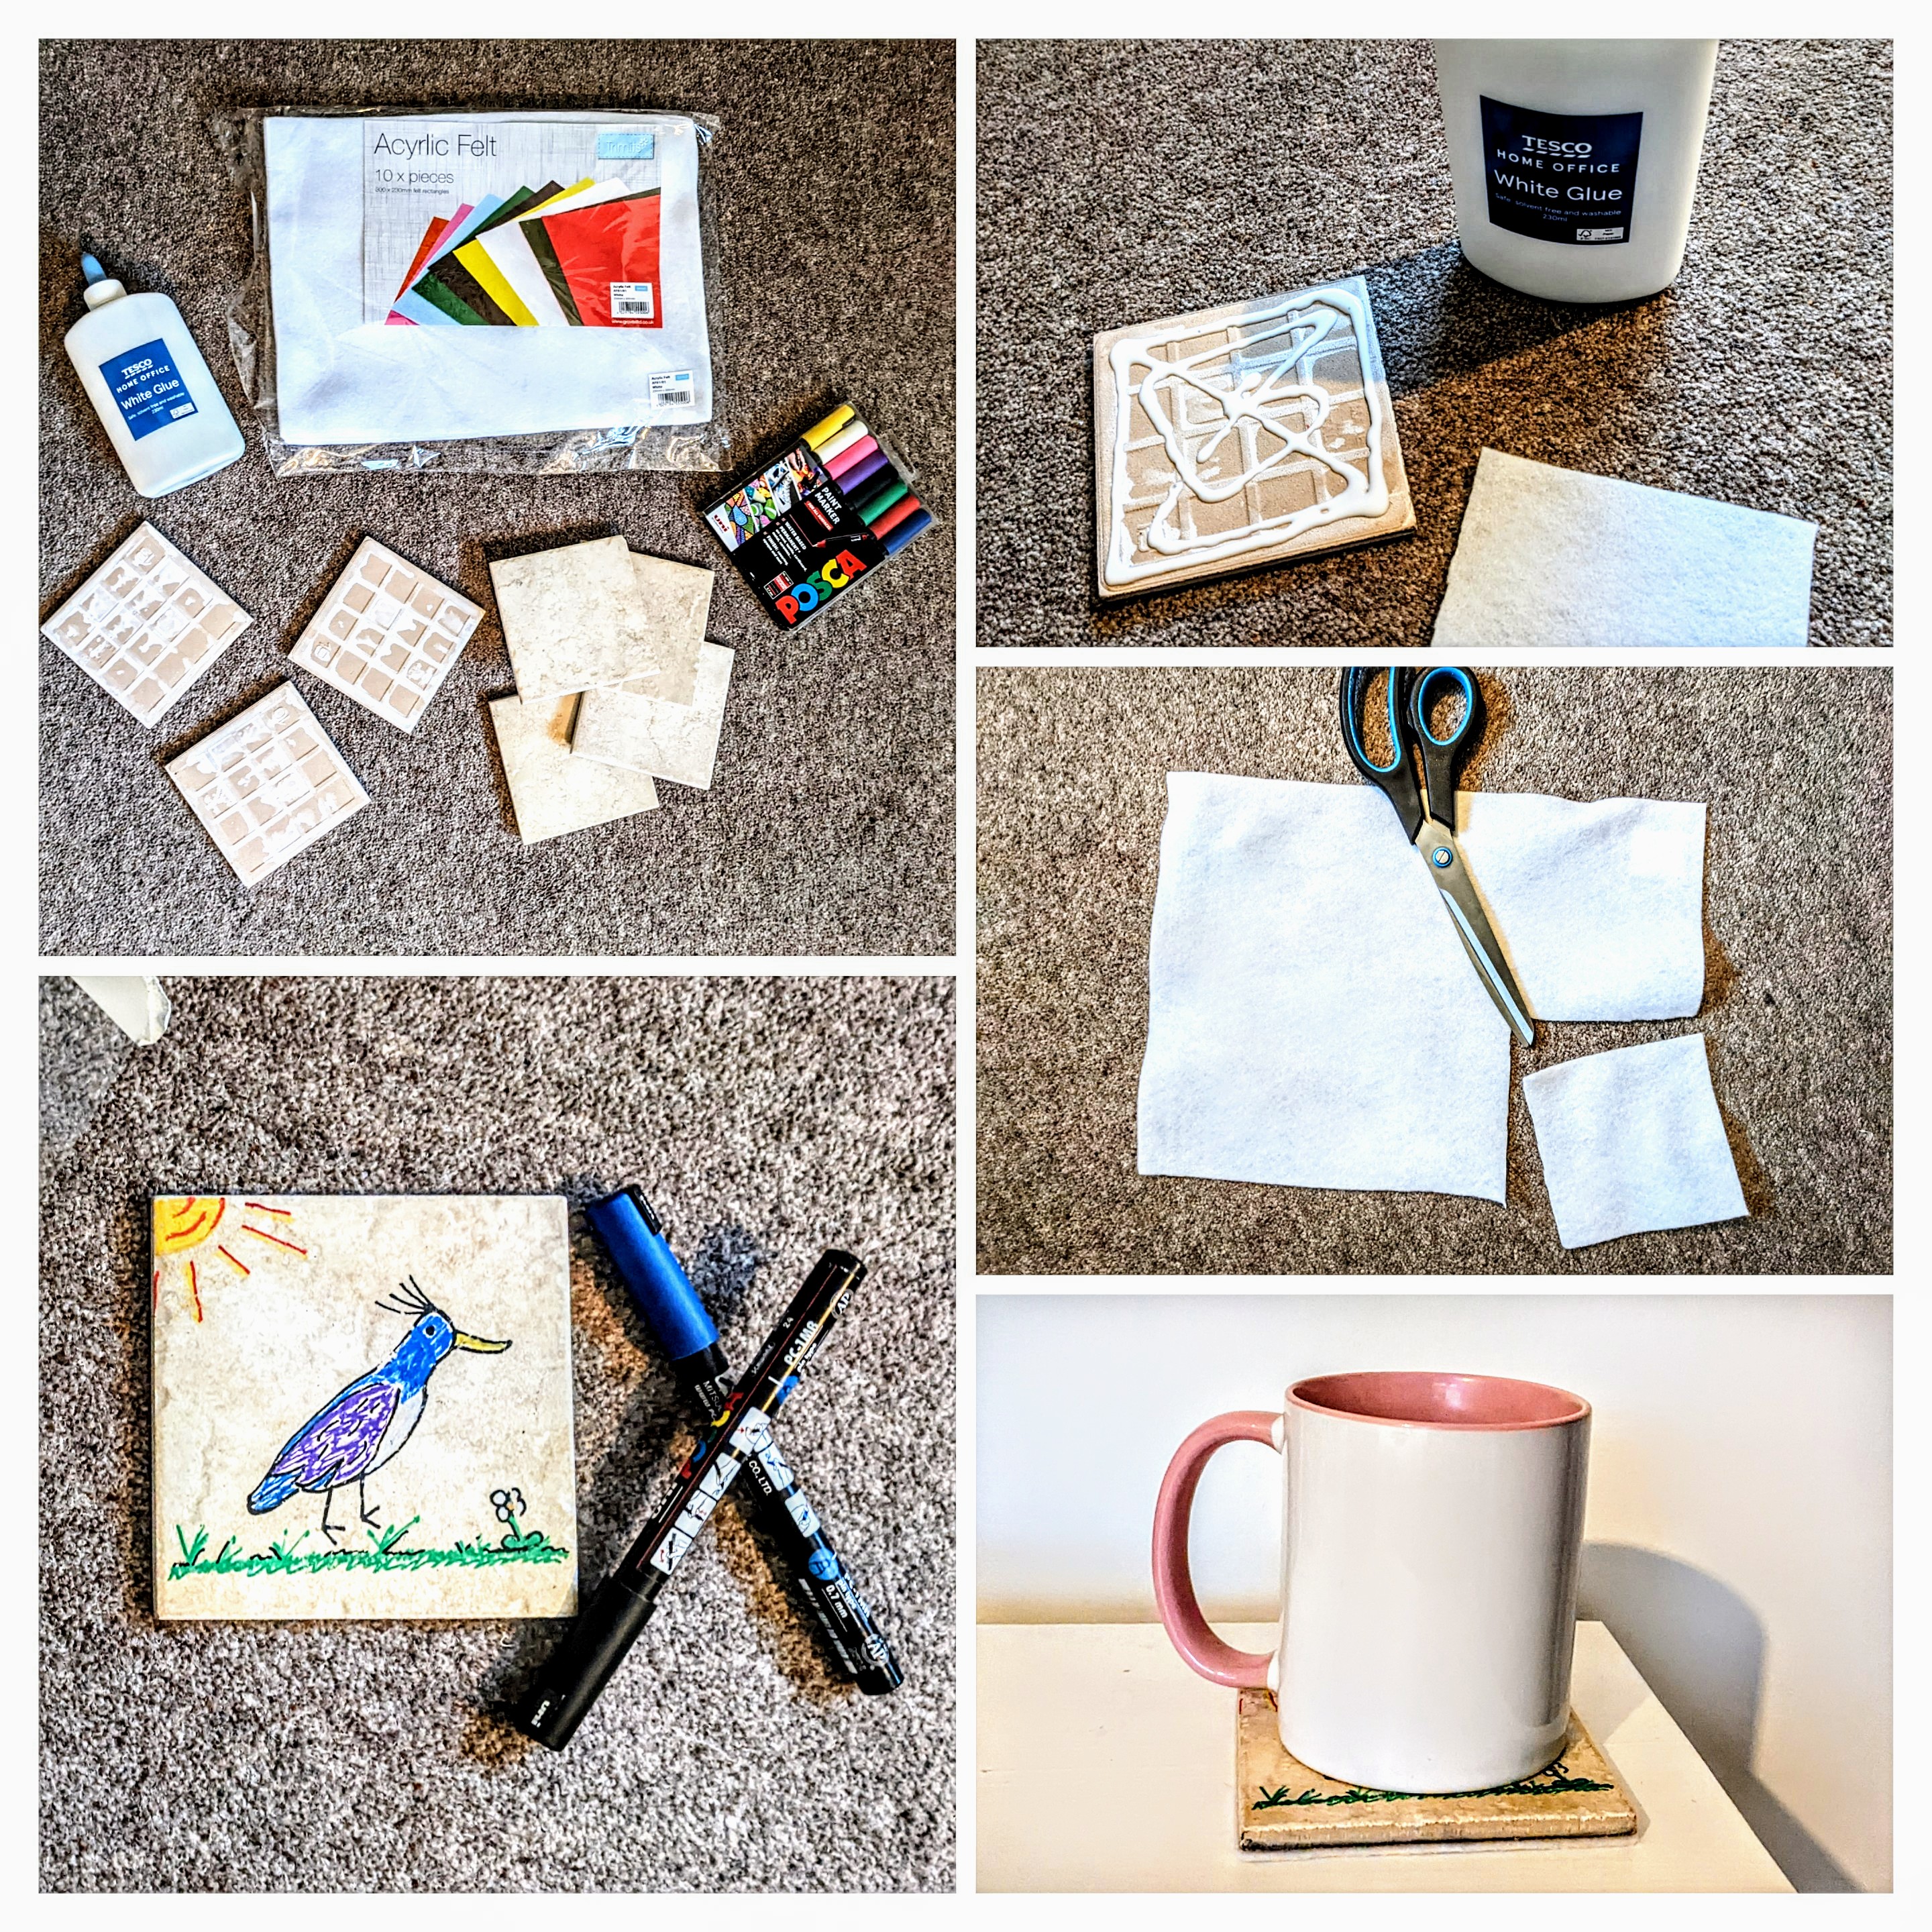
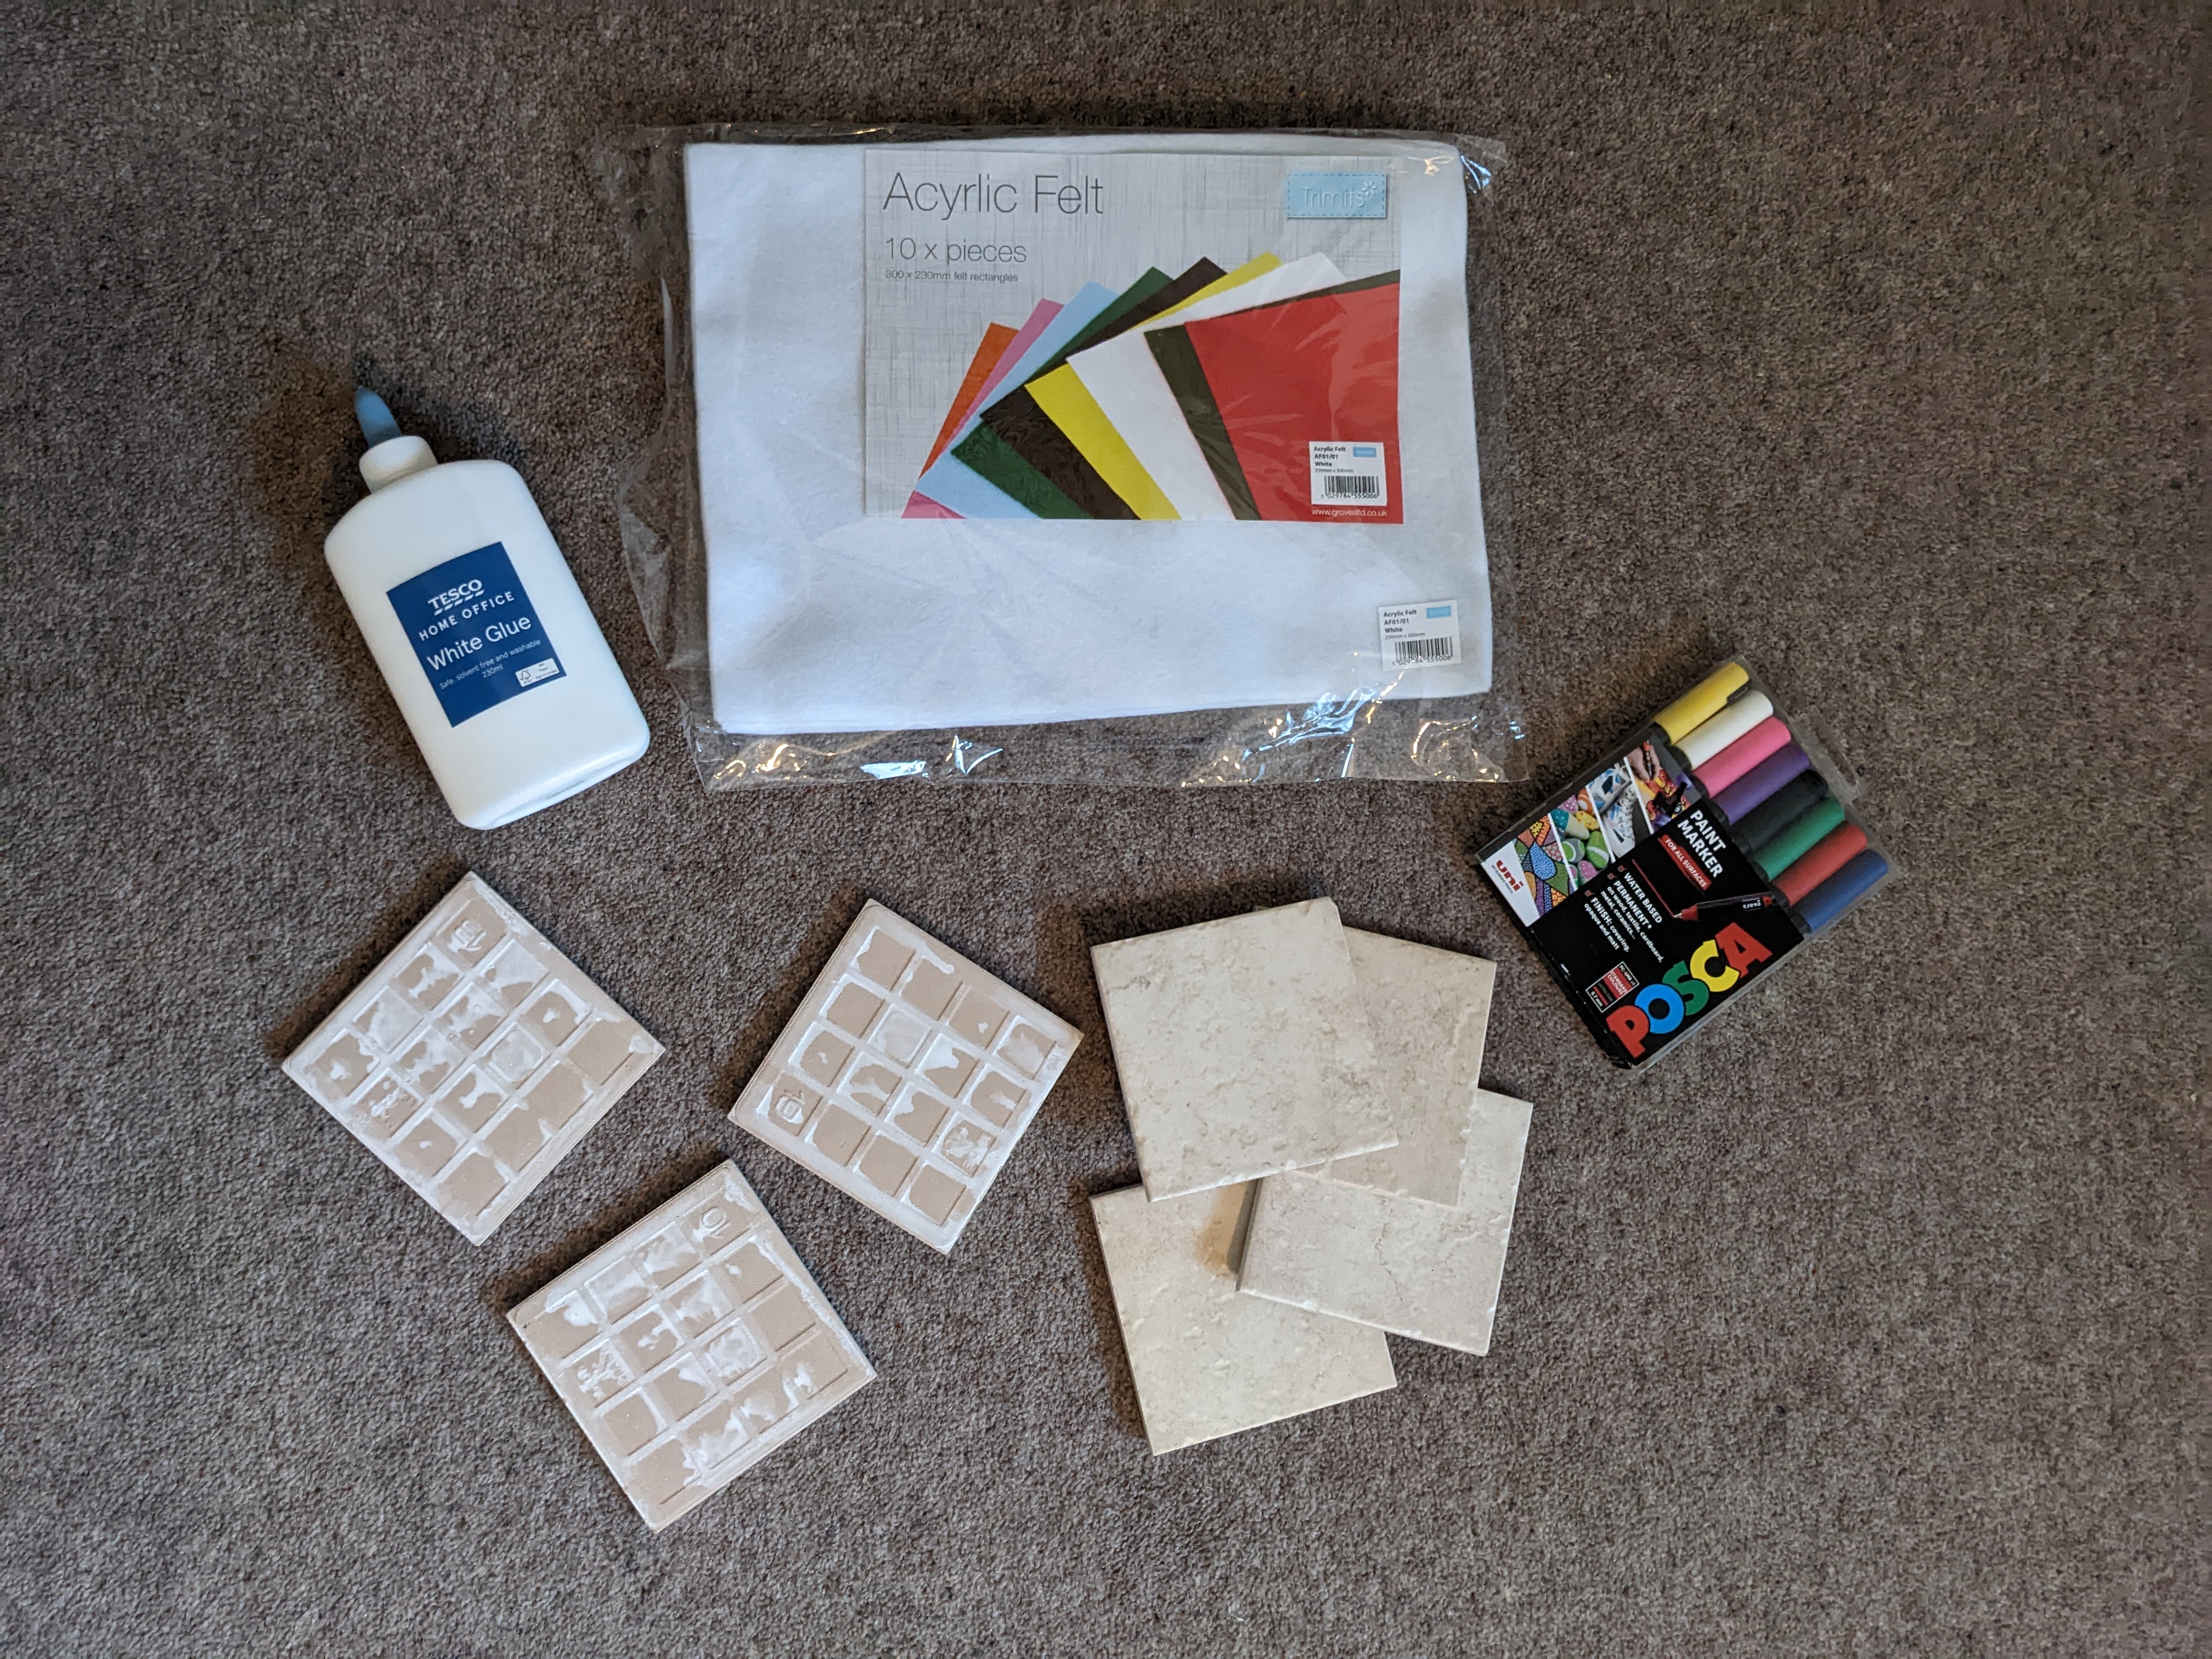

Tips:
We picked up our tiles on gumtree. You can decorate plain tiles, or use tiles which already have a pattern. Feel free to play around with different colour felt. You can even make your tiles from air-dry clay.
Stained Glass Tea Lights:
No wires are used in the making of these festive lights!
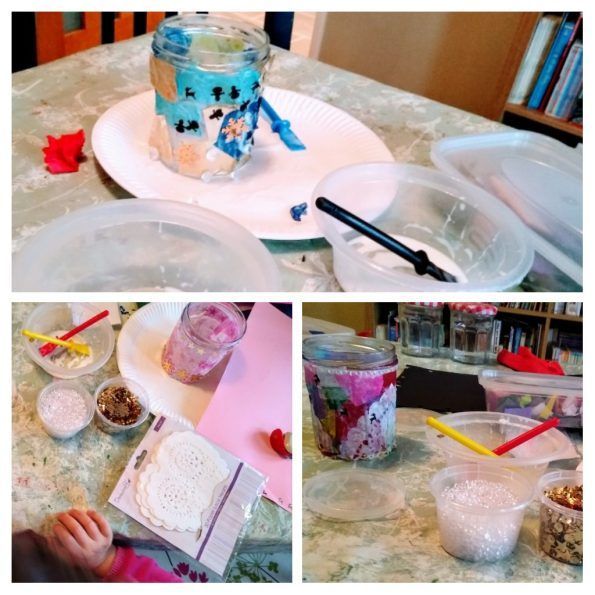
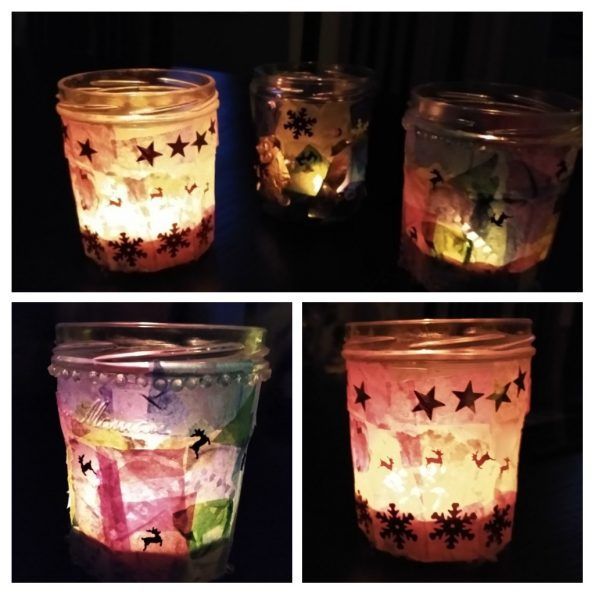
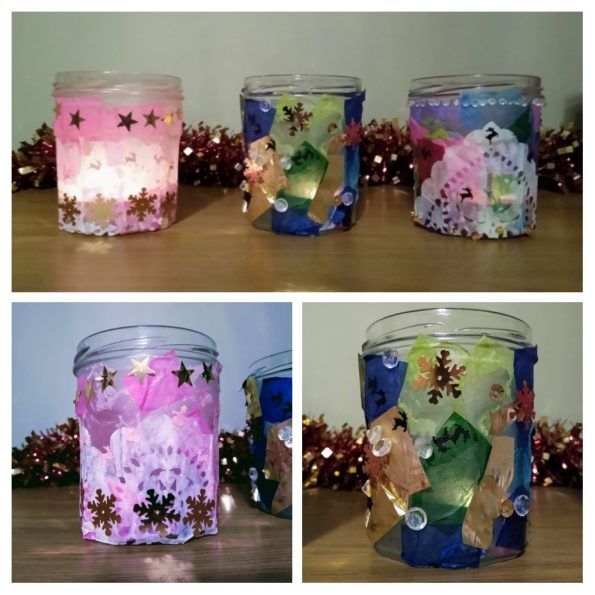
You will need:
Glass jar
Tissue paper
Paper doiley, beads and sequins (optional)
PVA glue
Glue stick or paint brush
Instructions:
Paint the glass with glue
Cover with squares of different colour tissue paper
Cover with a paper doiley, sequins, beads or other decorations
Paint over the top with glue to seal the decorations and give it a shiny finish.
Allow to dry and place a tea light inside.
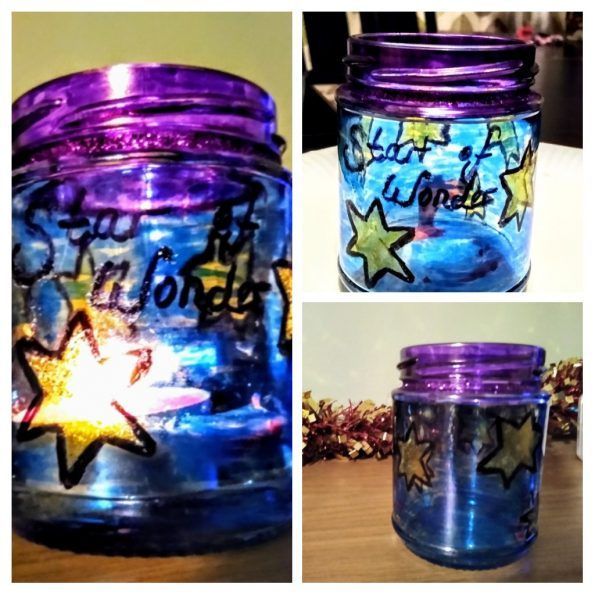
For a simpler variation of this craft you can draw on jars with colourful permanent markers and glitter glue.
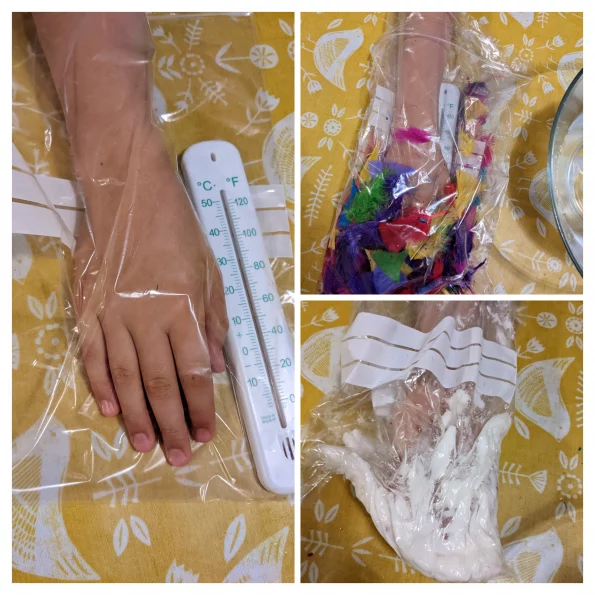
Science Experiment – Insulators
One of my favourite science experiments is testing which materials are the best insulators. It’s colourful, messy and hands-on. We didn’t actually use hair in our experiment. However, bubble wrap makes a good alternative and illustrates how hair works, trapping pockets of warm air around the body.
This experiment can be used when looking at animal adaptations, or when studying the explorers who first reached the North and South Poles, or as part of a study in textiles, or even during a space topic (as astronauts need to be well insulated in space).
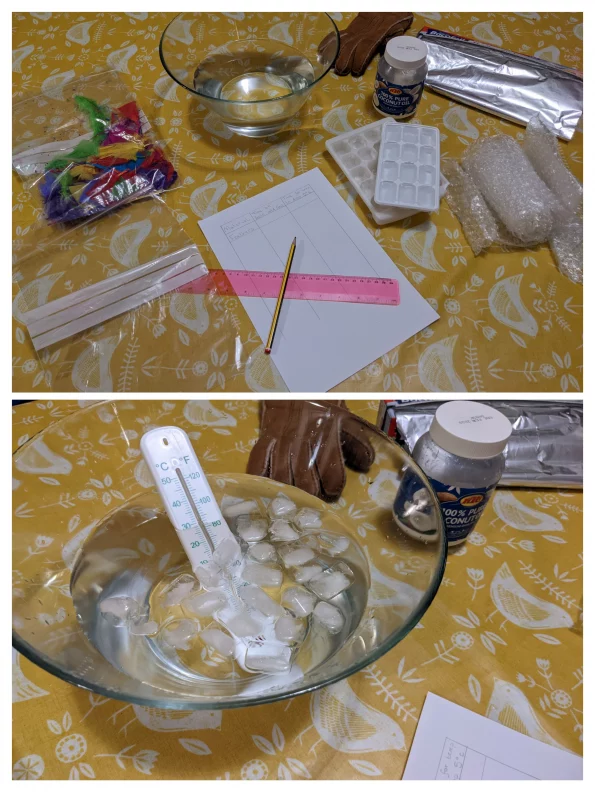
You will need:
- Sandwich bags
- Feathers
- Lard or coconut oil (solid fat to represent blubber)
- Bubble wrap
- Tin foil
- Leather glove
- Anything else you’d like to test for its insulating abilities!
- Large bowl of water
- Lots of ice
- Thermometers
Instructions:
- Prepare a large bowl of icy cold water, by adding lots of ice cubes.
- Place your test material in one sandwich bag, then place your hand in another sandwich bag and nestle it among the material in the first sandwich bag.
- Dunk your hand in the icy water and time how long it is before it starts to feel cold. For more accurate results you could use a thermometer. But I would definitely get the children to stick their hands in first – this stage is a lot of fun.
- Do the same with each material.
- Be sure to do a test run with two empty bags, to see if the materials really make any difference.
- Ask the children how to make the test fair, e.g. should you keep the water in the bowl a consistent temperature? Should you use the same sort of sandwich bags each time? What quantity of each material should you use? (It’s probably easier to measure volume rather than weight).
- Record your results in a table and plot them on a graph, if you like.

Treasure maps
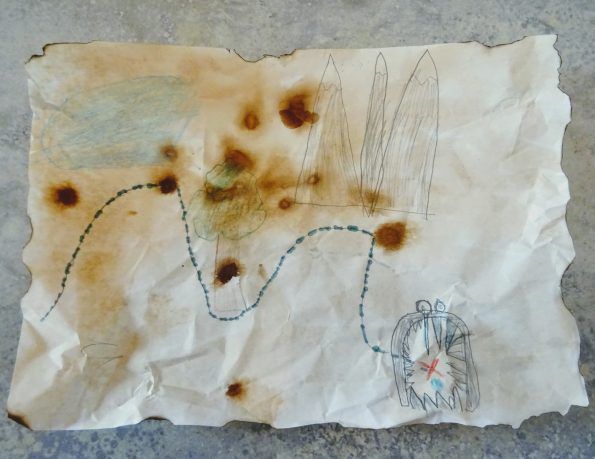
Ageing paper is such a simple craft, but fun and effective.
We made these maps a few days before our second ‘Theme day Thursday.’
You will need:
Coffee grains (you can also use a tea bag)
Hot water
Paper
Paint brush
Lighter or matches (optional)
Pens and pencils
Instructions:
Mix one heaped teaspoon of coffee with half a cup of hot water (young children will need an adult to do this)
Paint the paper with the coffee mix
Scatter a few grains of coffee on the wet paper (optional)
Allow paper to dry
Draw your treasure map
An adult can then very carefully burn some of the edges of the paper, using a lighter or match. Just do small bits at a time, blowing it out quickly as you go. I usually do this over a sink.
Salt Gems
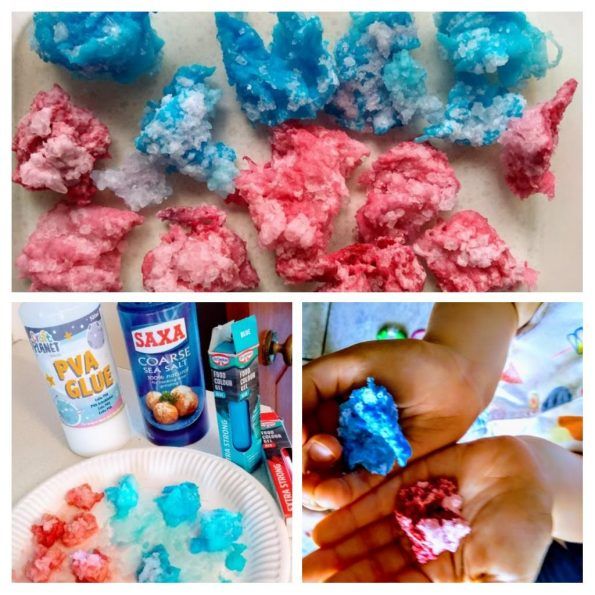
You will need:
4 tbsp course salt
1 tbsp PVA glue
2-3 drops of food colouring
Instructions:
Place it all in a food bag and squish together.
Take out lumps and place them on a plate to dry out for at least a few hours.
Enjoy your sparkly gems!
Lava Lamp
Homemade stickers


You will need;
1/2 sachet of gelatine or 2 leaves
4 tbsp hot water
Instructions:
1. Draw and colour in the pictures You would like to turn into stickers.
2. Stir the gelatine in the hot water until it is dissolved. (Young children will need an adult to do this step.)
3. Paint the gelatine mix on the back of the sticker.
4. Wait for it to dry completely (about 3 hours).
5. Cut out the sticker, lick and stick it where you want. We decorated a toy box and some of the kids school workbooks.
Engineering Lessons
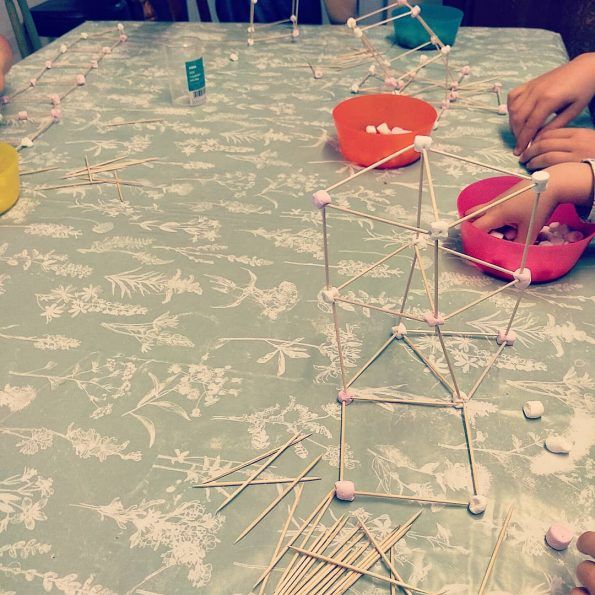
You will need:
Toothpicks
Mini marshmallows
Instructions:
1. Remind the children to be careful with sharps edges.
2. Have them make squares and triangles with the toothpicks and marshmallows.
3. Have them try to build towers and find out which shape and structure stands tallest or for the longest.
A Jar of Hope:
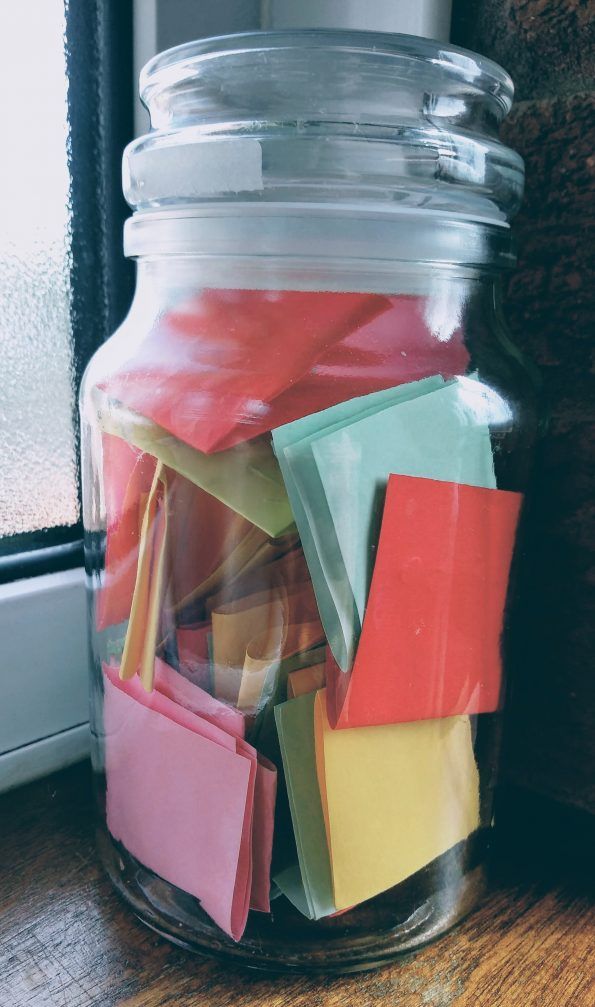
Recently somebody posted a fantastic idea on Facebook which we have implemented in our house.
We have a jar on the side and when we feel like we wish we could go somewhere or see someone, we write it on a slip of paper and stick it in our ‘jar of hope’.
Mostly it is just simple things like “play football at the home school group”, “go to the cinema”, “have a swimming lesson”, or “see our friends”.
When all this is over we will take out each slip of paper and try to do what is written on it, or make steps toward it – and be thankful for the simple pleasures we will be able to enjoy.
Bean Tepee


- Place a folded piece of kitchen roll around the inside of a couple of glass jars and dampen it carefully.
- Place three runner bean seeds around each jar between the glass and the kitchen roll.
- Keep the kitchen roll damp and in a few days you will begin to see roots emerge from the seed. This is great for young children to see the stages of germination.
- When the stem and leaves begin to appear, allow them to grow to around 5 inches before planting out.
- Prepare an area of ground that gets at least 6 hours full sun, by digging to loosen the soil and removing any weeds.
- Insert bean poles in a tepee formation and tie with string at the top to provide stability.
- Plant the beans next to each bean pole and very gently guide the bean plant around the pole. (Plant out at the end of April when there is no longer a risk of frost and keep the plants watered, especially when they go into flower).
Owl craft


You will need:
- Air drying clay (you can also use salt dough for a cheaper alternative)
- Thick felt tip pen lid
- Lollipop stick
Instructions:
- Roll a small piece of clay into a ball
- Flatten it into a circle
- Use the pen lid to make semi circle patterns on the middle of the circle of clay to look like feathers
- Fold over a small piece either side to look like wings
- Fold down the top to make a face and shape the ears
- Press the top of the pen lid down in the clay to make eyes
- Use the lollipop stick to make a nose.
- Make a hole in the top with a skewer so you can hang your creations (optional).
- Allow to harden and paint if desired.
Christmas decorations
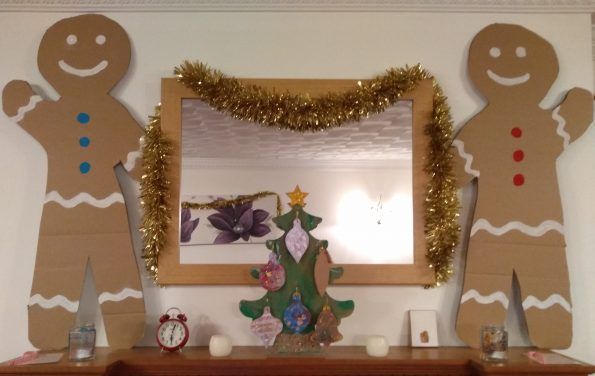
You will need;
Large cardboard box
Stanley knife, sharp knife or large scissors
Pencil
Paint
Instructions
1.Draw a large gingerbread man on your cardboard box.
2.Cut it out (depending on the thickness of the card a knife will be a lot easier than scissors).
3.Paint on a face, buttons and decorations. You will need at least 2 coats of paint.
Peter’s Boat Craft
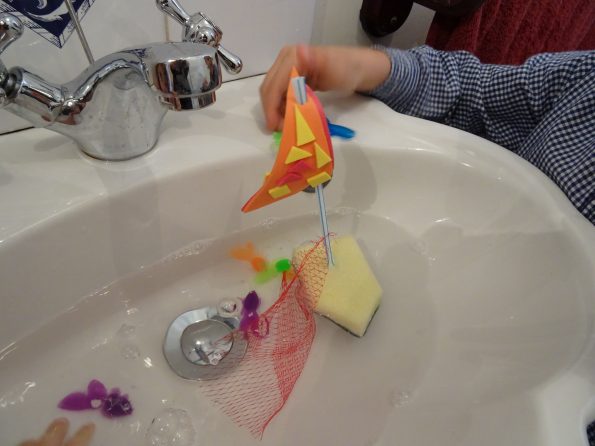
You will need:
Sponge
Straw
Self adhesive foam sheets (we used these)
Glue gun
Netting (we used the net from a pack of nectarines)
scissors
Instructions:
1.Cut corners off the end of the sponge and make a hole in the middle to insert straw.
2.Slide some netting onto the straw
3.Cut 2 triangular sails out of foam, and stick together.
4.Make a hole in the top and bottom of the sail using the scissors and insert the straw through them (alternatively stick the sails straight onto the straw, see pic above)
5.Use a glue gun (out of reach of small children) to glue the straw in place.
6.Decorate the sail (optional).
7.Let the kids play with them in the sink/bath or paddling pool encouraging them to re-enact the bible stories.
Loo Roll Birds
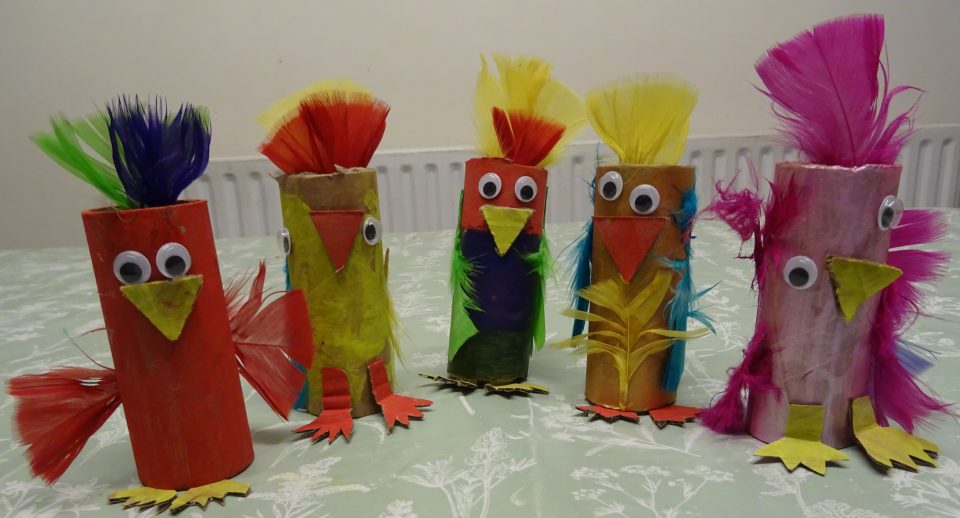
You will need:
Toilet roll
Cardboard
Paint
PVA glue
Small glue stick or paint brush for spreading glue
Googly eyes
Feathers
Instructions:
1. Paint the toilet roll and cardboard in your chosen colours.
2. Allow the paint to dry and then cut a beak and feet shapes out of the cardboard.
3. Glue the beak, feet and eyes on.
4. Glue on a number of feathers to resemble wings and plumes.
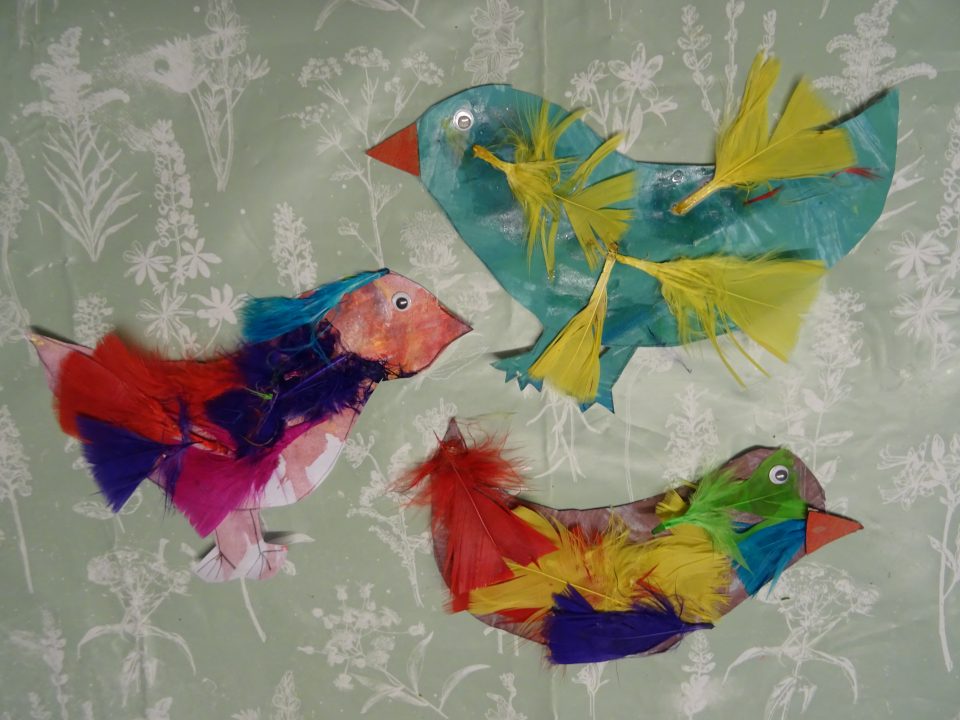
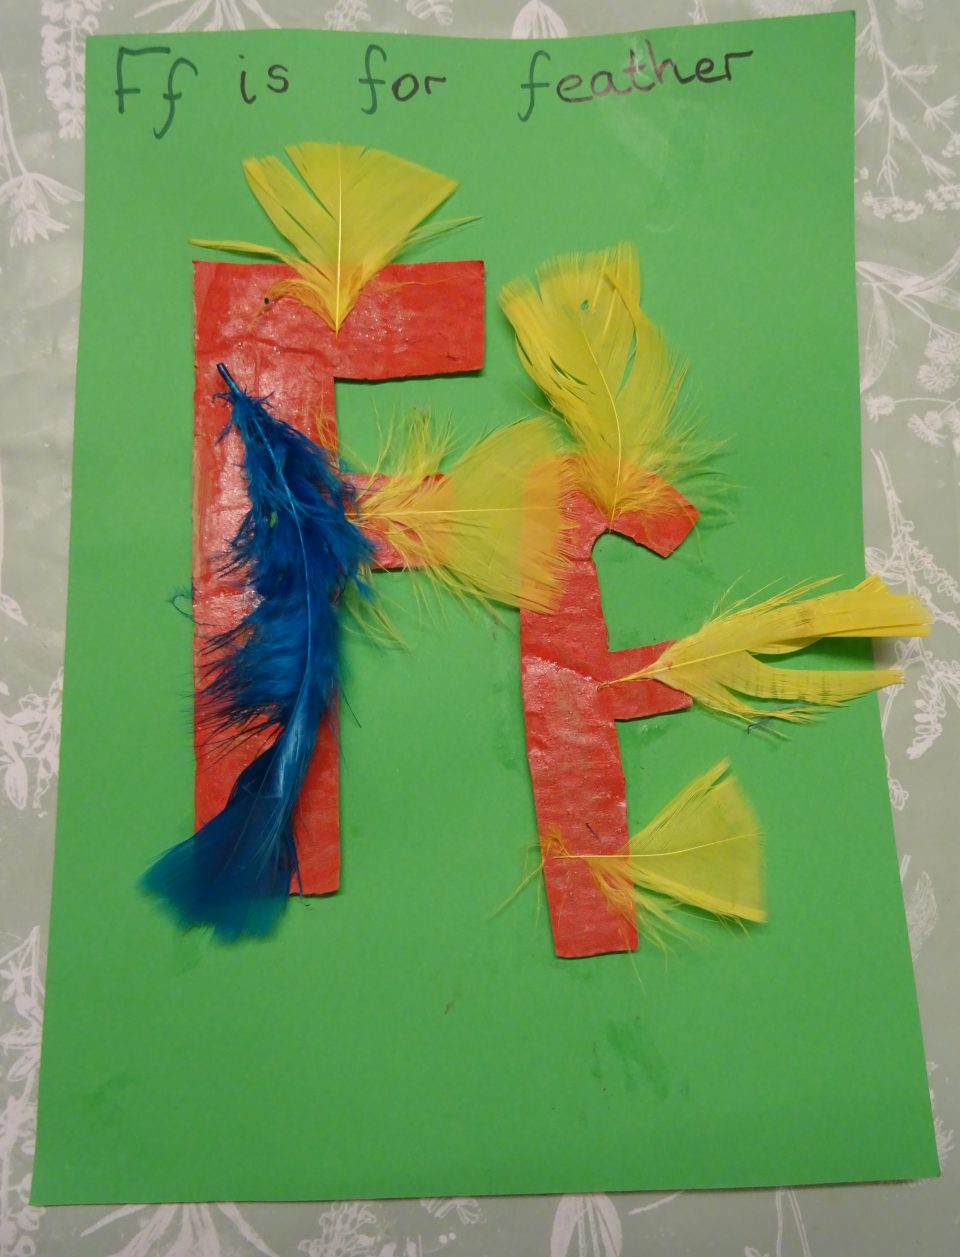
These are some other simple craft ideas while you have got the feathers out. The first is painted paper cut into bird shapes. In the second the ‘F’ was cut from spare painted cardboard from the above craft.
Homemade Christmas gift ideas:
– Fudge (this recipe from Nigella is easy, tasty and adaptable)
– Roasted Spiced Nuts
– Mulled wine kit (you can dry your own orange and apple segments very easily in the oven)
– Honeycomb in a tin or bag (it is cheap to make and who doesn’t love it – don’t make it too early though or it will start to deteriorate)
– Homemade Christmas Pudding (love this recipe by Delia)
– Scented bath salts (add essence and a little colour to ordinary bath salt and put in a jar tied with ribbon)
– Homemade soap
– Hand painted plant pots
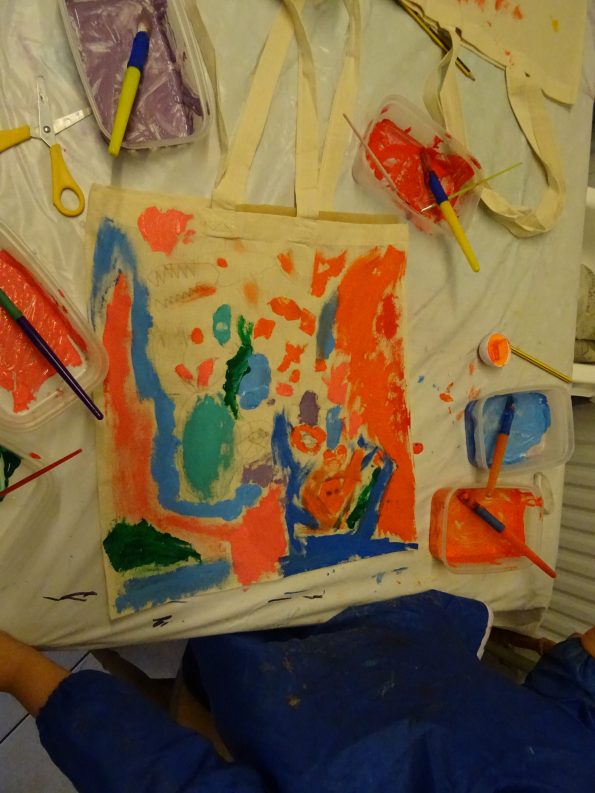
– Hand painted tote bags (use fabric paint and iron to seal)
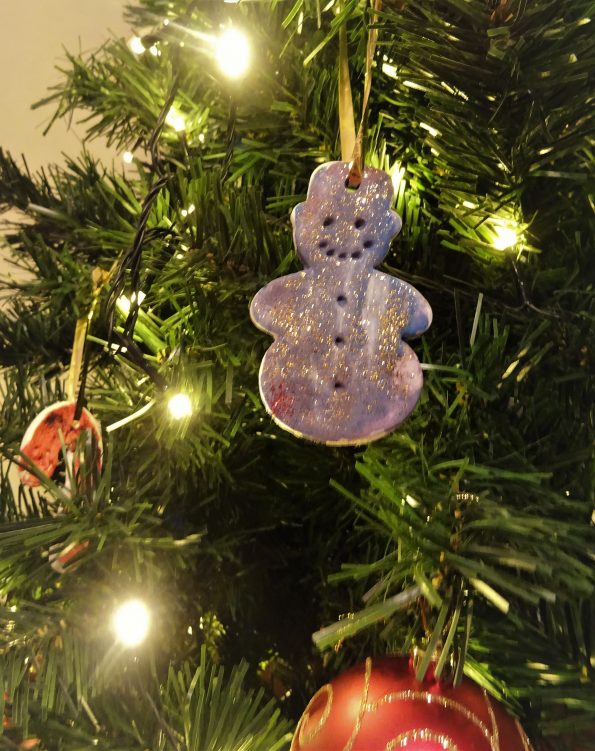
– Homemade Christmas tree decorations (use cookie cutters to cut shapes out of air dry clay and poke a hole in the top. Once dry paint and add glitter, then tie with a ribbon).
Tree of knowledge craft
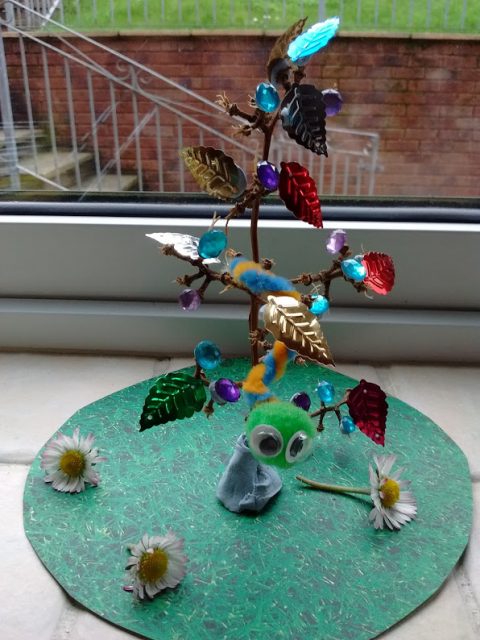
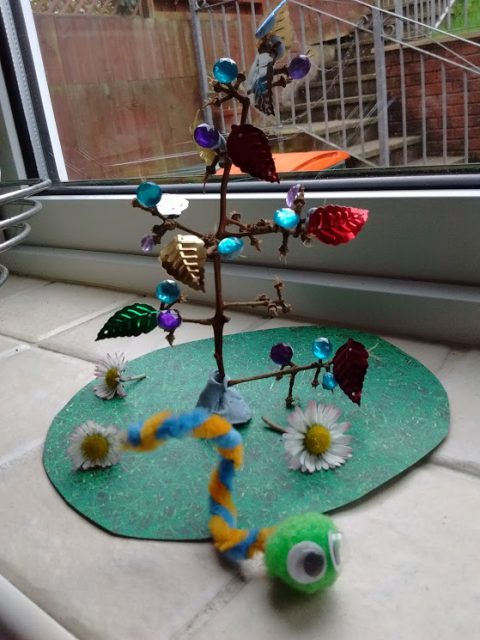
You will need:
- Circle of card (green works well)
- The whole stem of a bunch of grapes that have been eaten
- Sticky tac (Blu or white tac)
- Gold leaves (you could cut your own from coloured card)
- Sequences, gems or beads
- 2 different coloured pipe cleaners
- 1 small pompom
- 2 small googly eyes
- Glue
Instructions:
- For the tree: Stand your empty grape stem on the card using a good sized lump of sticky tac.
- Attach gold leaves and gems to the end of branches using small pieces of sticky tac.
- For the snake: Twist together the 2 pipe cleaners.
- Attach the pompom to one end by pushing the end of the pipe cleaners through the middle of the pompom then folding over the ends of the pipe cleaners.
- Glue googly eyes to the pompom.
- Balance your snake on the branches of the tree.
Optional – decorate with small flowers from the garden.
Salt dough fossil dig


You will need:
- 250 g Salt
- 250g flour
- 125ml Water
- Plastic dinosaur toys
- Paint
- Deep tray
- Compost
- Small spades/spoons
- Paint brushes
- Paper and pencil
- Bucket
- Net
- Tweezers (optional)
- Gardeners thread and tape (Optional)
Instructions:
- Mix together the salt and flour.
- Slowly add the water until it forms a doughy consistency. Then knead into a smooth dough. (You may need more or less water than that stated.)
- Roll into small balls and flatten slightly.
- Press different parts of the toy dinosaur into the dough to make impressions of their body parts – e.g. claw, face, tail, foot.
- Allow dough to completely dry out overnight.
- Once dry and hard, have your child paint the fossils.
- Allow paint to dry.
- Bury the fossils in a deep tray of dry compost or mud.
- Attach string horizontally and vertically across the tray to make a grid so the children can record which part of the grid they discovered the fossil like a real archaeologist (optional).
- Have the child gently dig up the fossils, sifting them in the net and brushing them clean with their paintbrush. Explain that fossils are very delicate.
- Children can draw their findings on their paper.
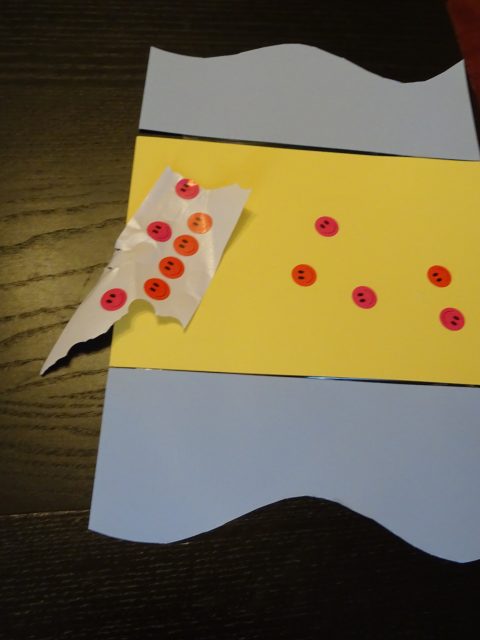
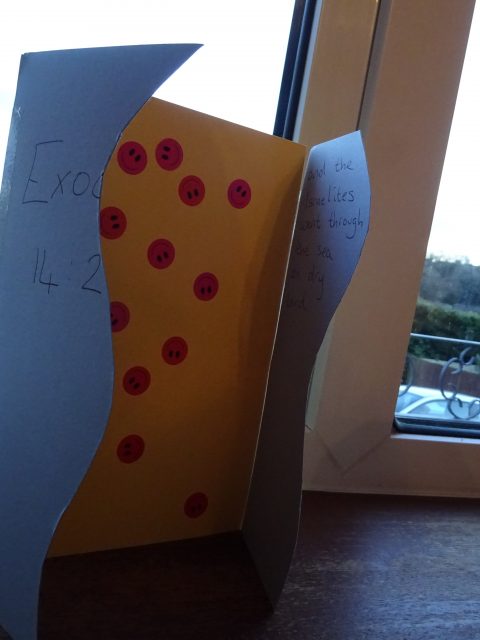
Crossing the Sea
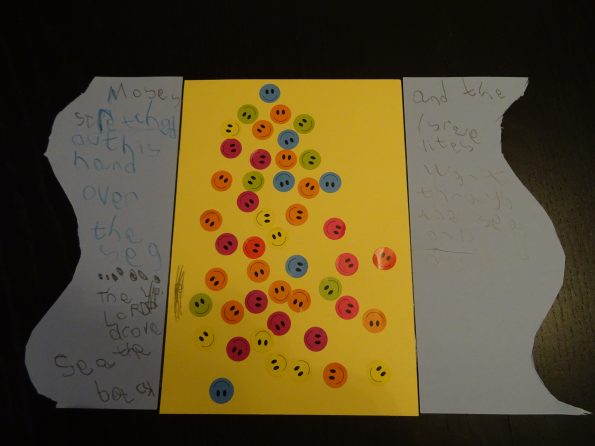
This is a very simple and easy craft. However my kids really enjoyed it, retelling the story to each other, and closing the waters over Pharaoh’s chasing chariots!
It was simple enough for even my youngest (14 months) to be included. However, getting the older children to write out the Bible verses made it challenging for them too.
You will need:
- Yellow and blue A5 card
- Scissors
- Clear tape
- Smiley face stickers
Instructions:
- Cut the blue card down the middle and tape each half to one side of the yellow card so the blue card opens and closes (like a cupboard).
- Have children stick the smiley faces on the yellow paper to represent the happy Israelites crossing on the dry ground.
- Write snippets from Exodus 14:21
") ,22 (optional).
,22 (optional).

Mosaic Alphabet Craft
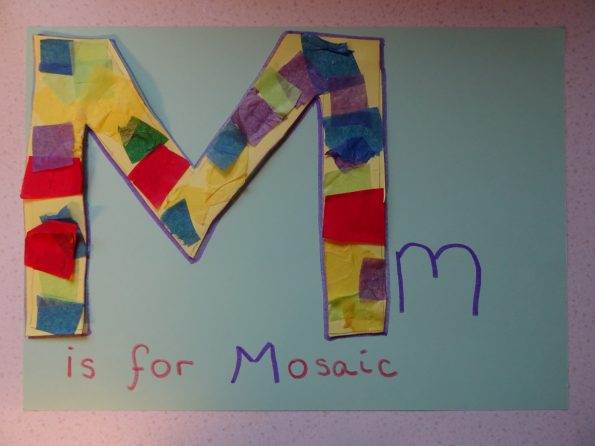
With 4 children under the age of 6, there is an awful lot of repetition of the alphabet in our house. “A for alligator; B for bee…” I won’t bore you with the rest!
I’d like to share a simple alphabet craft. It encourages fine motor skills, as tots can practice cutting and sticking. It also teaches children shapes, simple mosaics and, of course, the alphabet.
You will need:
– A4 card or paper
– Tissue paper
– Scissors
– Glue
Instructions:
1. Draw out a large letter on the card.
2. Have your child cut out small pieces of tissue paper. Encourage them to cut a specific shape, e.g. squares, triangles or circles (don’t worry if they are not very good at this just let them try and give them a hand if they need it).
3. Have them stick the tissue inside the letter.
Alternatives
+ Do this on tracing paper cut it out and hang in the window for a ‘stain glass’ effect.
+ Try using coloured card, fabric, buttons or felt instead of tissue paper.
+ Draw a simple outline of an object or creature like a bee, let the child fill in with tissue, then write below ‘Bb is for Bee.’
+ Why not find a video on you tube about mosaics or stain glass windows aimed at children and turn your alphabet craft into an art lesson too.
Birthday Card Craft
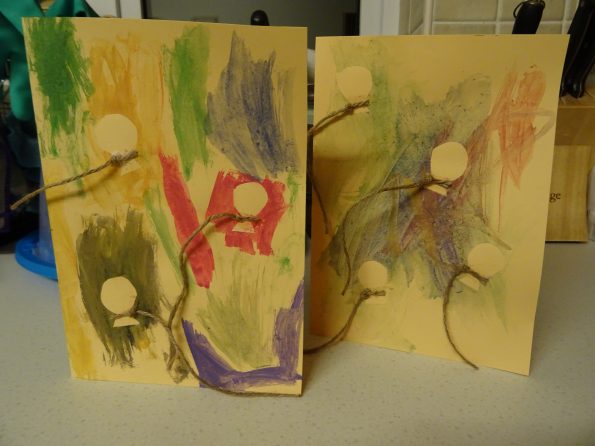
You will need:
- A4 Card – any colour
- Masking tape
- Scissors
- Paint (Watercolours work well and in my experience are less messy)
- Paintbrushes
- Yarn
- Glue stick
Instructions:
- Fold card in half
- Cut balloon shapes out of masking tape, 3-5 per card and stick on the front of the folded card
- Let your child paint anything they like, encourage them to paint around the balloons
- Leave the paint to dry completely
- Peel off the masking tape
- Cut short strips of yarn, tie knots 1 cm in and stick onto the balloons (optional)